
Hi baking friends!
Vegan Chocolate Orange Mousse Cake – need I say more?!? Orange and chocolate is just one of those delicious combos that I can’t resist!
I grew up eating Terry’s Chocolate Oranges so orange and chocolate has a special place in my heart. Speaking of chocolate… I’ve been on a bit of a chocolate craze lately. If you’re obsessed like me then you can find all my chocolate recipes here!
I could talk about chocolate and orange all day but how about we skip to the recipe straight away?? As usual the full recipe will be at the bottom of this page but I’ll break down the process so you guys nail this delicious cake the first time!
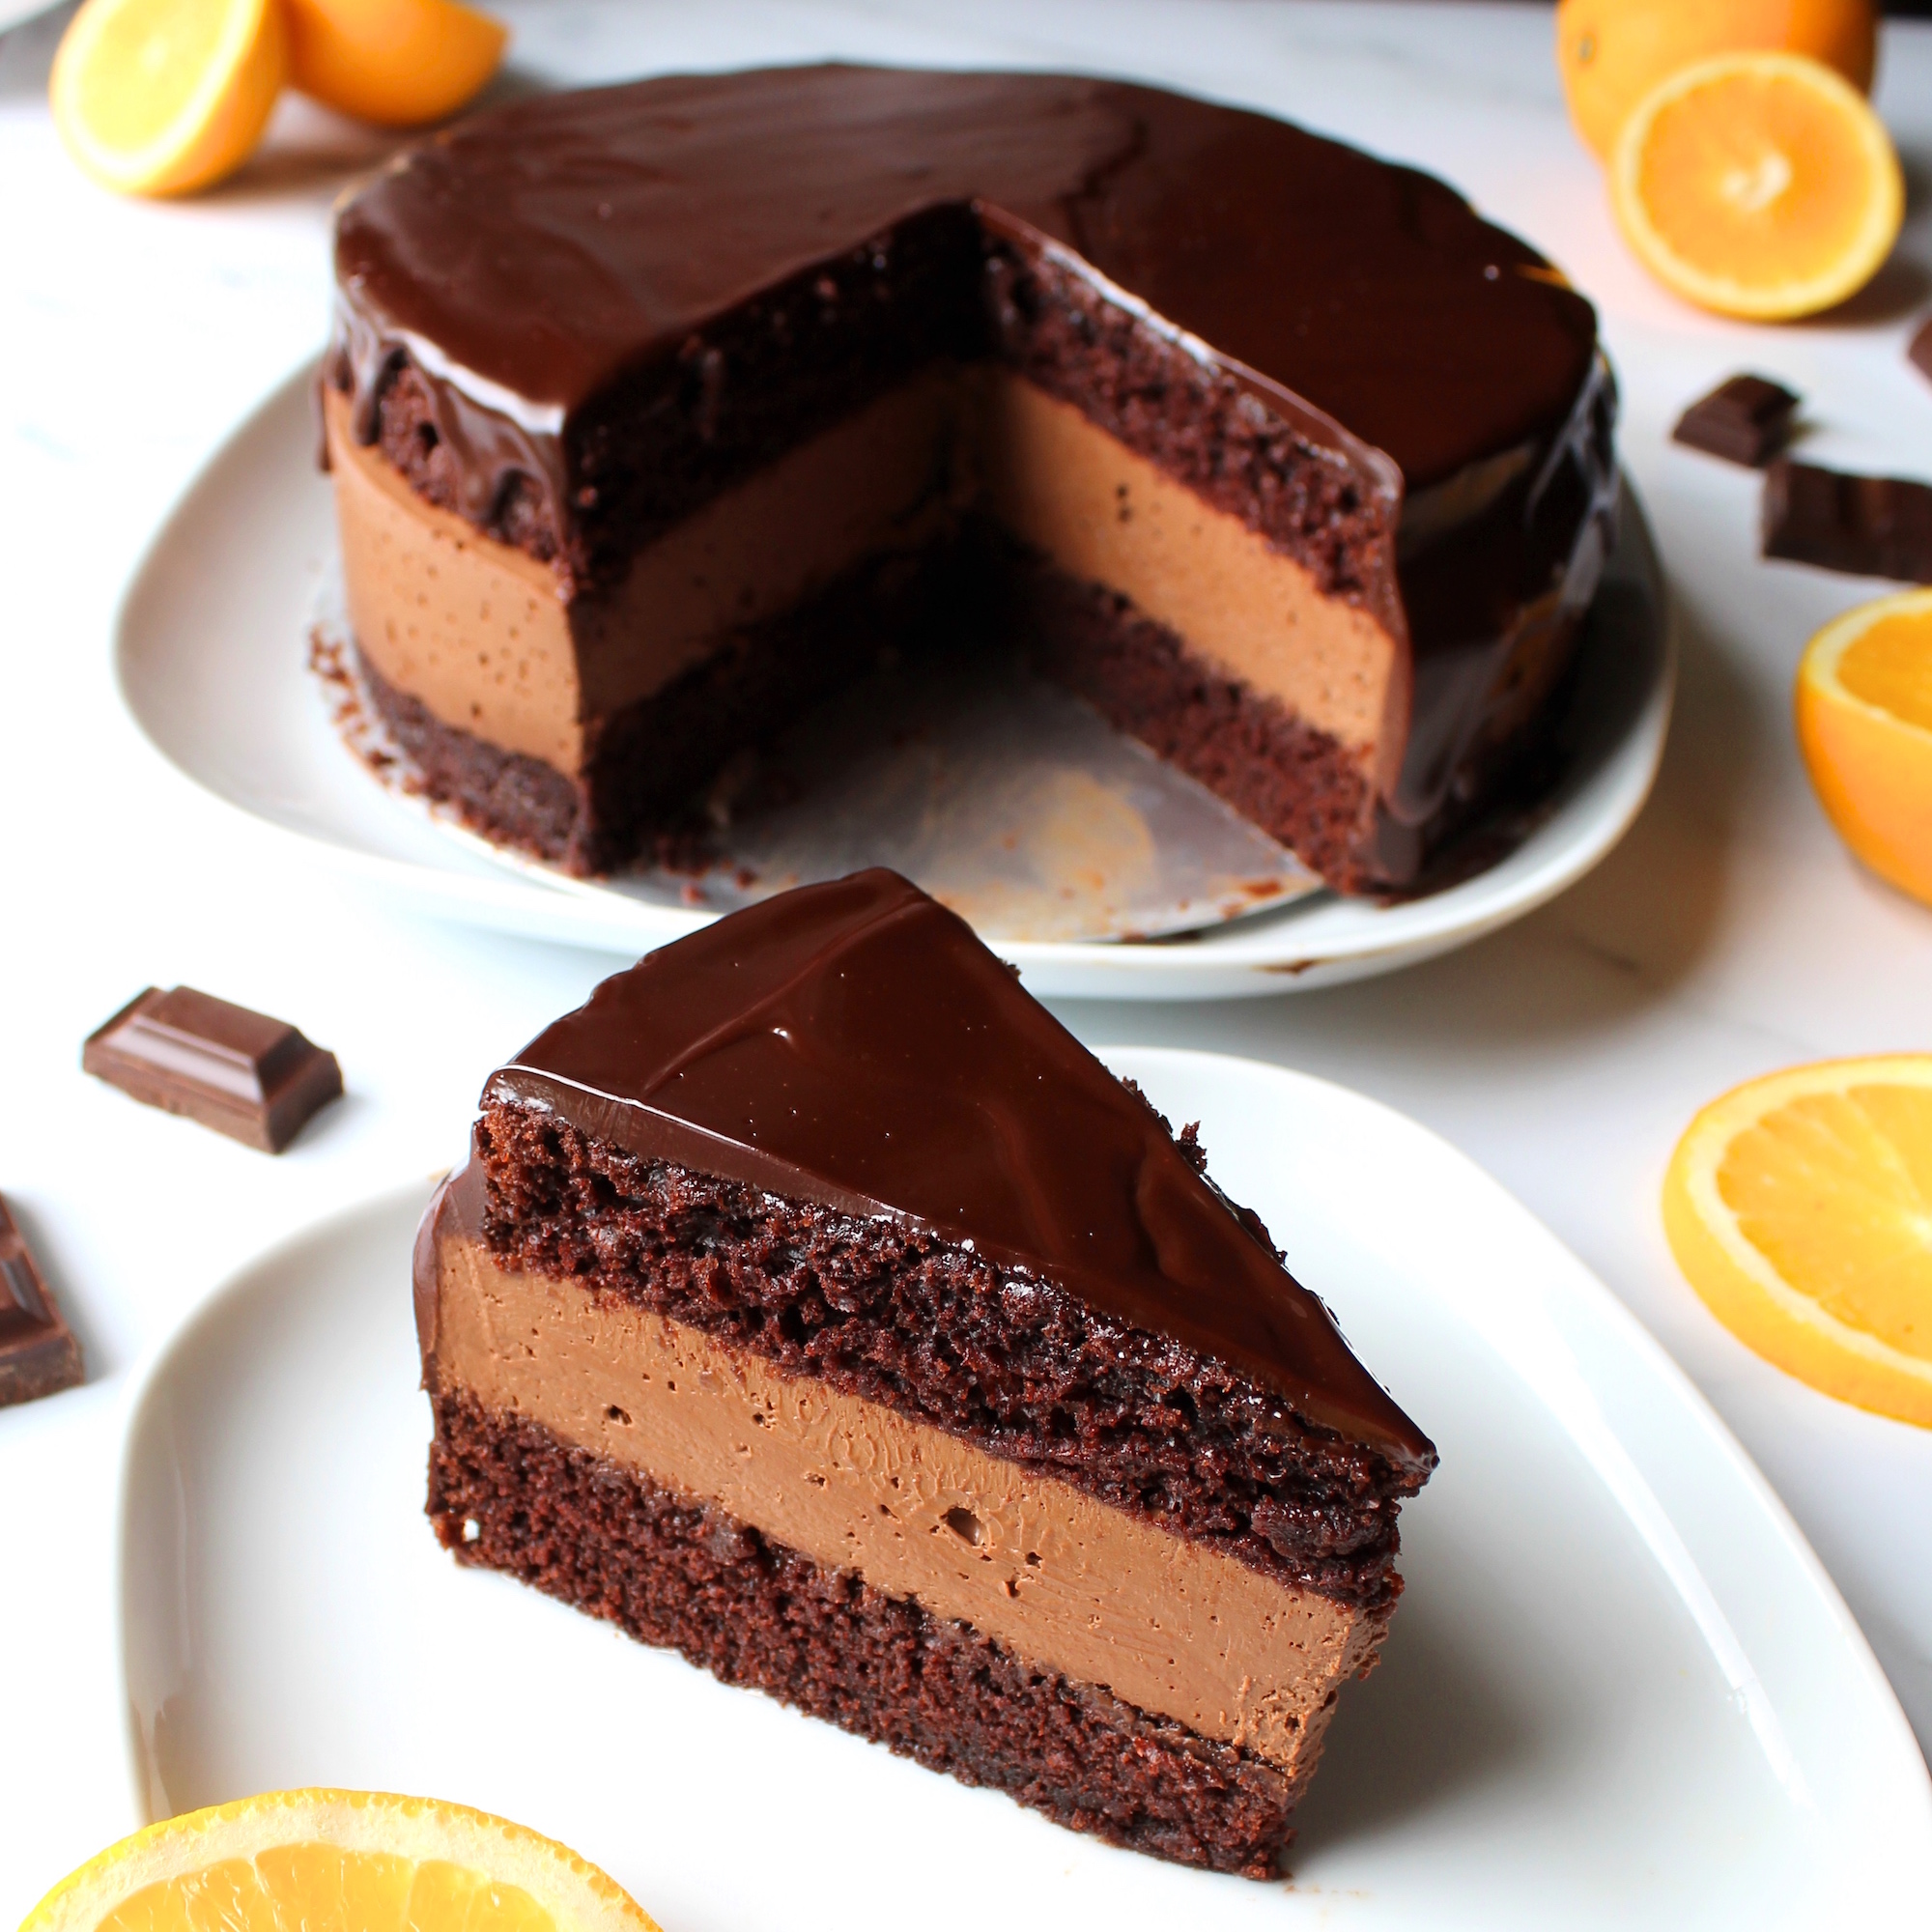
This bake consists of 3 elements: the chocolate cake, the chocolate orange mousse and the ganache! Let’s start off with the chocolate cake!
Pre-heat the oven to 180C and line your 8-inch loose bottom cake tin with baking parchment.
As usual, sift all the dry ingredients together and set aside. If you want a really bold orange flavour, add some additional orange zest into the batter at this stage! Mix the apple cider vinegar into the soy milk to create a pseudo-buttermilk! It’s paramount that you warm the milk first – the heat will bring out the flavour of the cocoa and it will warm up the overall batter so it cooks more evenly in the oven! Feel free to add in a tbsp of espresso powder too if you want to deepen that rich chocolate flavour.
Stick with natural cocoa powder and not dutch processed cocoa powder. Dutch processed cocoa powder is treated with alkaline solutions to neutralise the acidity of the cocoa. Since we are using baking soda as the raising agent (an alkaline), we need the other ingredients to be acidic to cause the reaction that creates an airy sponge. This is why apple cider vinegar is included in the recipe!
Pour the rest of the wet ingredients into the buttermilk, then create a well in the dry ingredients and then pour the wet into the dry mix. Whisk until fully incorporated! Pour the batter into the cake tin and bake for 40 minutes. I thoroughly recommend using a cake strip on the cake tin. Using a cake strip will allow the cake to bake in a perfect disc with minimal doming. This is optimal for us because we want as deep as cake as possible so we can get two thick layers of chocolate cake. If you want to make your own then check out this super easy tutorial by PreppyKitchen!
Once cooked, allow the cake to cool for an hour before you start cutting it. Ideally place it in your fridge to cool overnight. When it is cool, take the cake out of the tin and, using a wire cutter or serrated knife, cut the cake into two even layers. Leave one layer in the base of the cake tin, ready for the mousse to be poured on top.
Chocolate “mousse”:
Now let’s talk about the mousse layer! If you’ve been following my blog for a while you’ll know I’m pretty obsessed with aquafaba meringue and you may be thinking I’m be using it here! Surprise – I’m not! After a few experiments I found that a food processor whips a fair amount of air into the silken tofu so the meringue isn’t necessary. We also need this layer to be fairly sturdy to support another cake layer on top so it’s best to avoid additional wet ingredients!
One of my favourite parts of this mousse is that it has loads of fresh orange juice inside it! What a way to really emphasis that irresistible juicy, citrusy flavour. Make sure you are using SILKEN tofu for this recipe not regular tofu. I use Clearspring organic silken tofu.
In a food processor, add all the ingredients except for the chocolate (silken tofu, orange juice, orange extract, vanilla extract, maple syrup). Blitz until smooth. You can also use a blender/smoothie maker for this step! Don’t be shy with the mixing at this stage. I have found the longer I mix it the more bubbles I get into the mousse.
Melt the chocolate using a bain-marie or in the microwave using 30 second bursts. Pour the melted chocolate into the food processor and pulse a few times until it is incorporated. Don’t overdo it as you’ll start to pop some of the bubbles we whipped up.
Pour the mousse onto the bottom cake layer in the tin. Place the cake tin in the fridge for 20 minutes to partially set. After 20 minutes, take it back out the fridge and place the top cake layer on the mousse. Put the whole cake back in the fridge (covered) to set overnight (or for a few hours).
Ganache:
My recipe has specified soy milk/cream but you can substitute almost any liquid here for a different flavour ganache. Here are some examples: coconut cream, Elmlea plant cream, almond milk or even water!
Heat up the soy cream or milk in saucepan on low heat. When it starts to simmer, pour it onto the 100g of chocolate and set aside for 5 minutes to melt. Pour the ganache layer over the top of the cake and serve immediately!

Troubleshooting:
Sometimes if you overbake or overmix the chocolate cake it will shrink slightly in the cake tin when you take it out of the oven. This is an issue because when you pour the mousse into the cake tin it might leak into the gap around the cake. There are three solutions for this:
- Create a new barrier with a piece of acetate (or foiling or parchment) around the bottom layer of cake.
- Provided the gap isn’t larger than a few mm, you can also just weight for the mousse to set a little and then pour it in. As the chocolate starts to set the mousse will become a lot thicker and it is much less likely to squeeze down the gaps without external pressure.
- Instead of using the original cake tin, use a smaller cake tin (7″ if you have one) and cut the cake down to the new size.
Ultimately if you cannot avoid a bit of leaked mousse, it doesn’t matter too much. You can just scrape the mousse off at the very end with a spatula before covering entirely with ganache so no one can see it!
For this recipe you will need:
- 8-inch loose-bottom cake tin
- food processor/blender
Enjoy!!
Chocolate Orange Mousse Cake
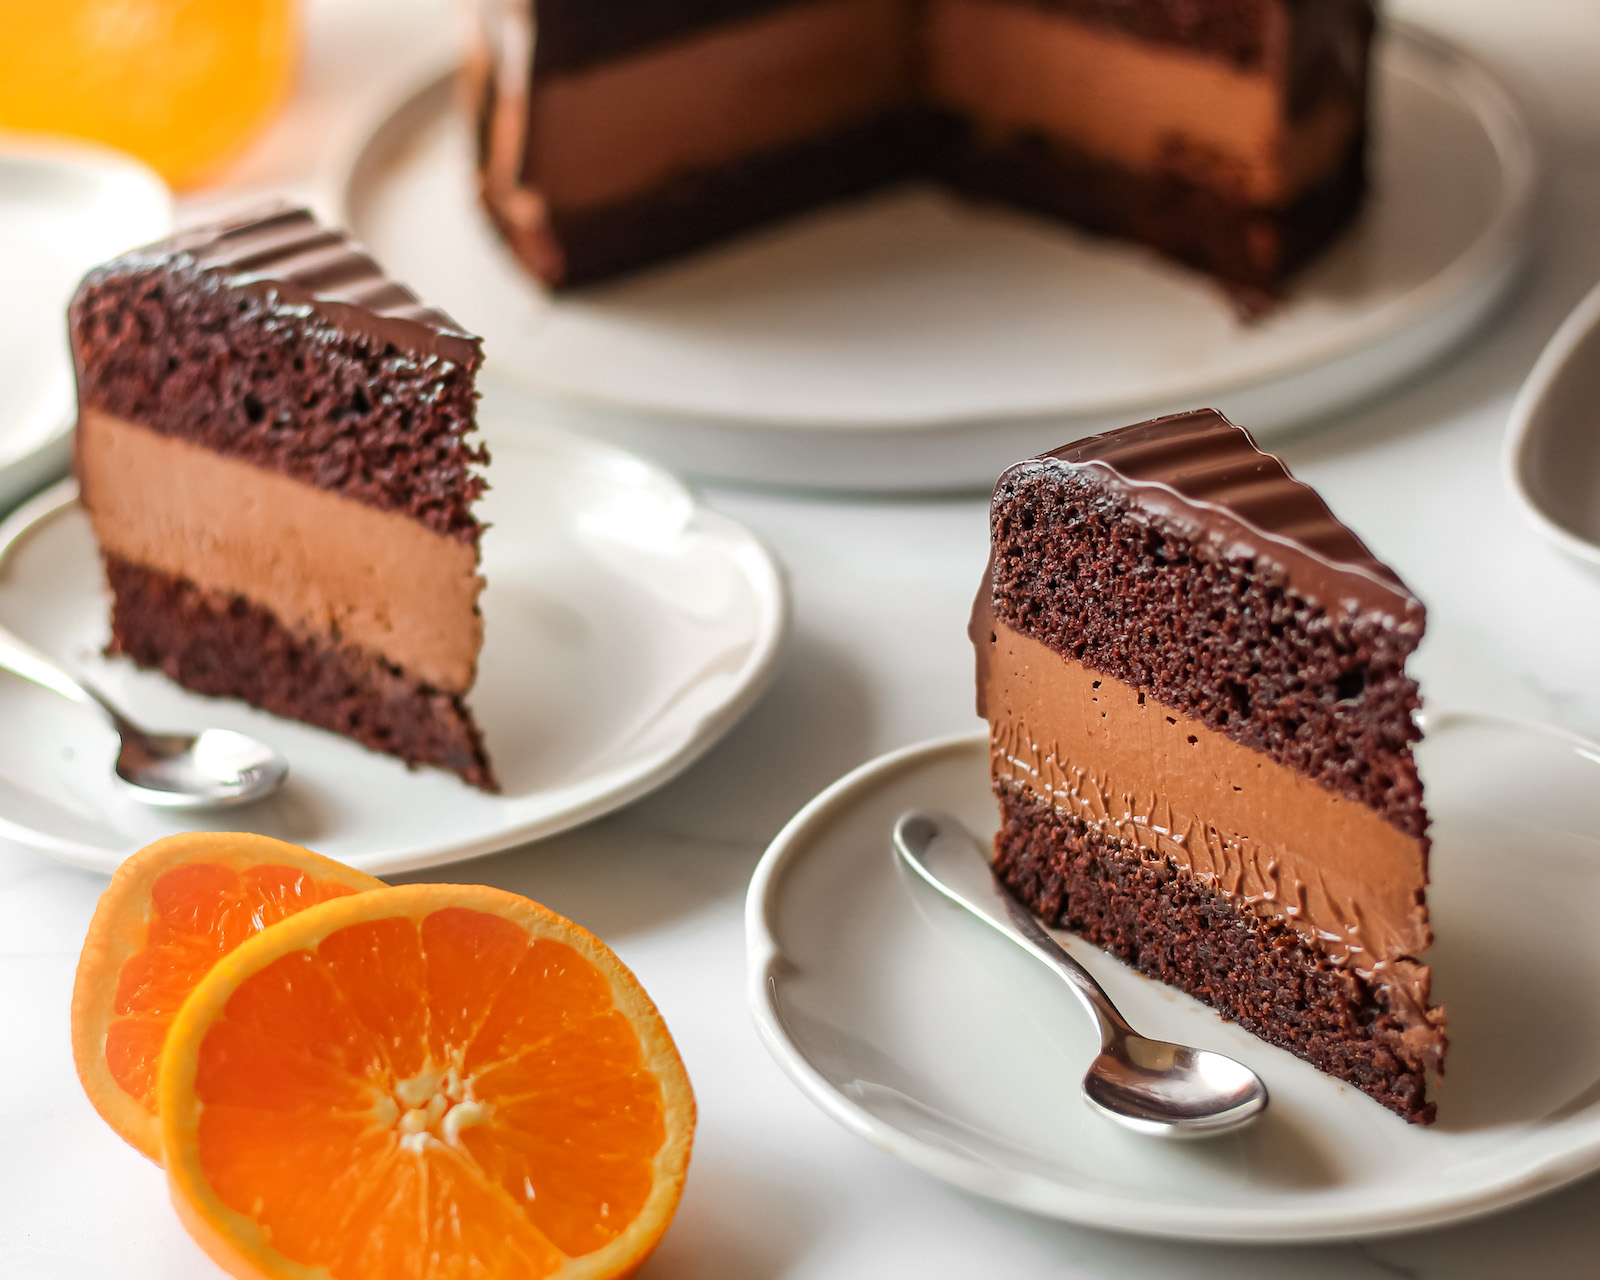
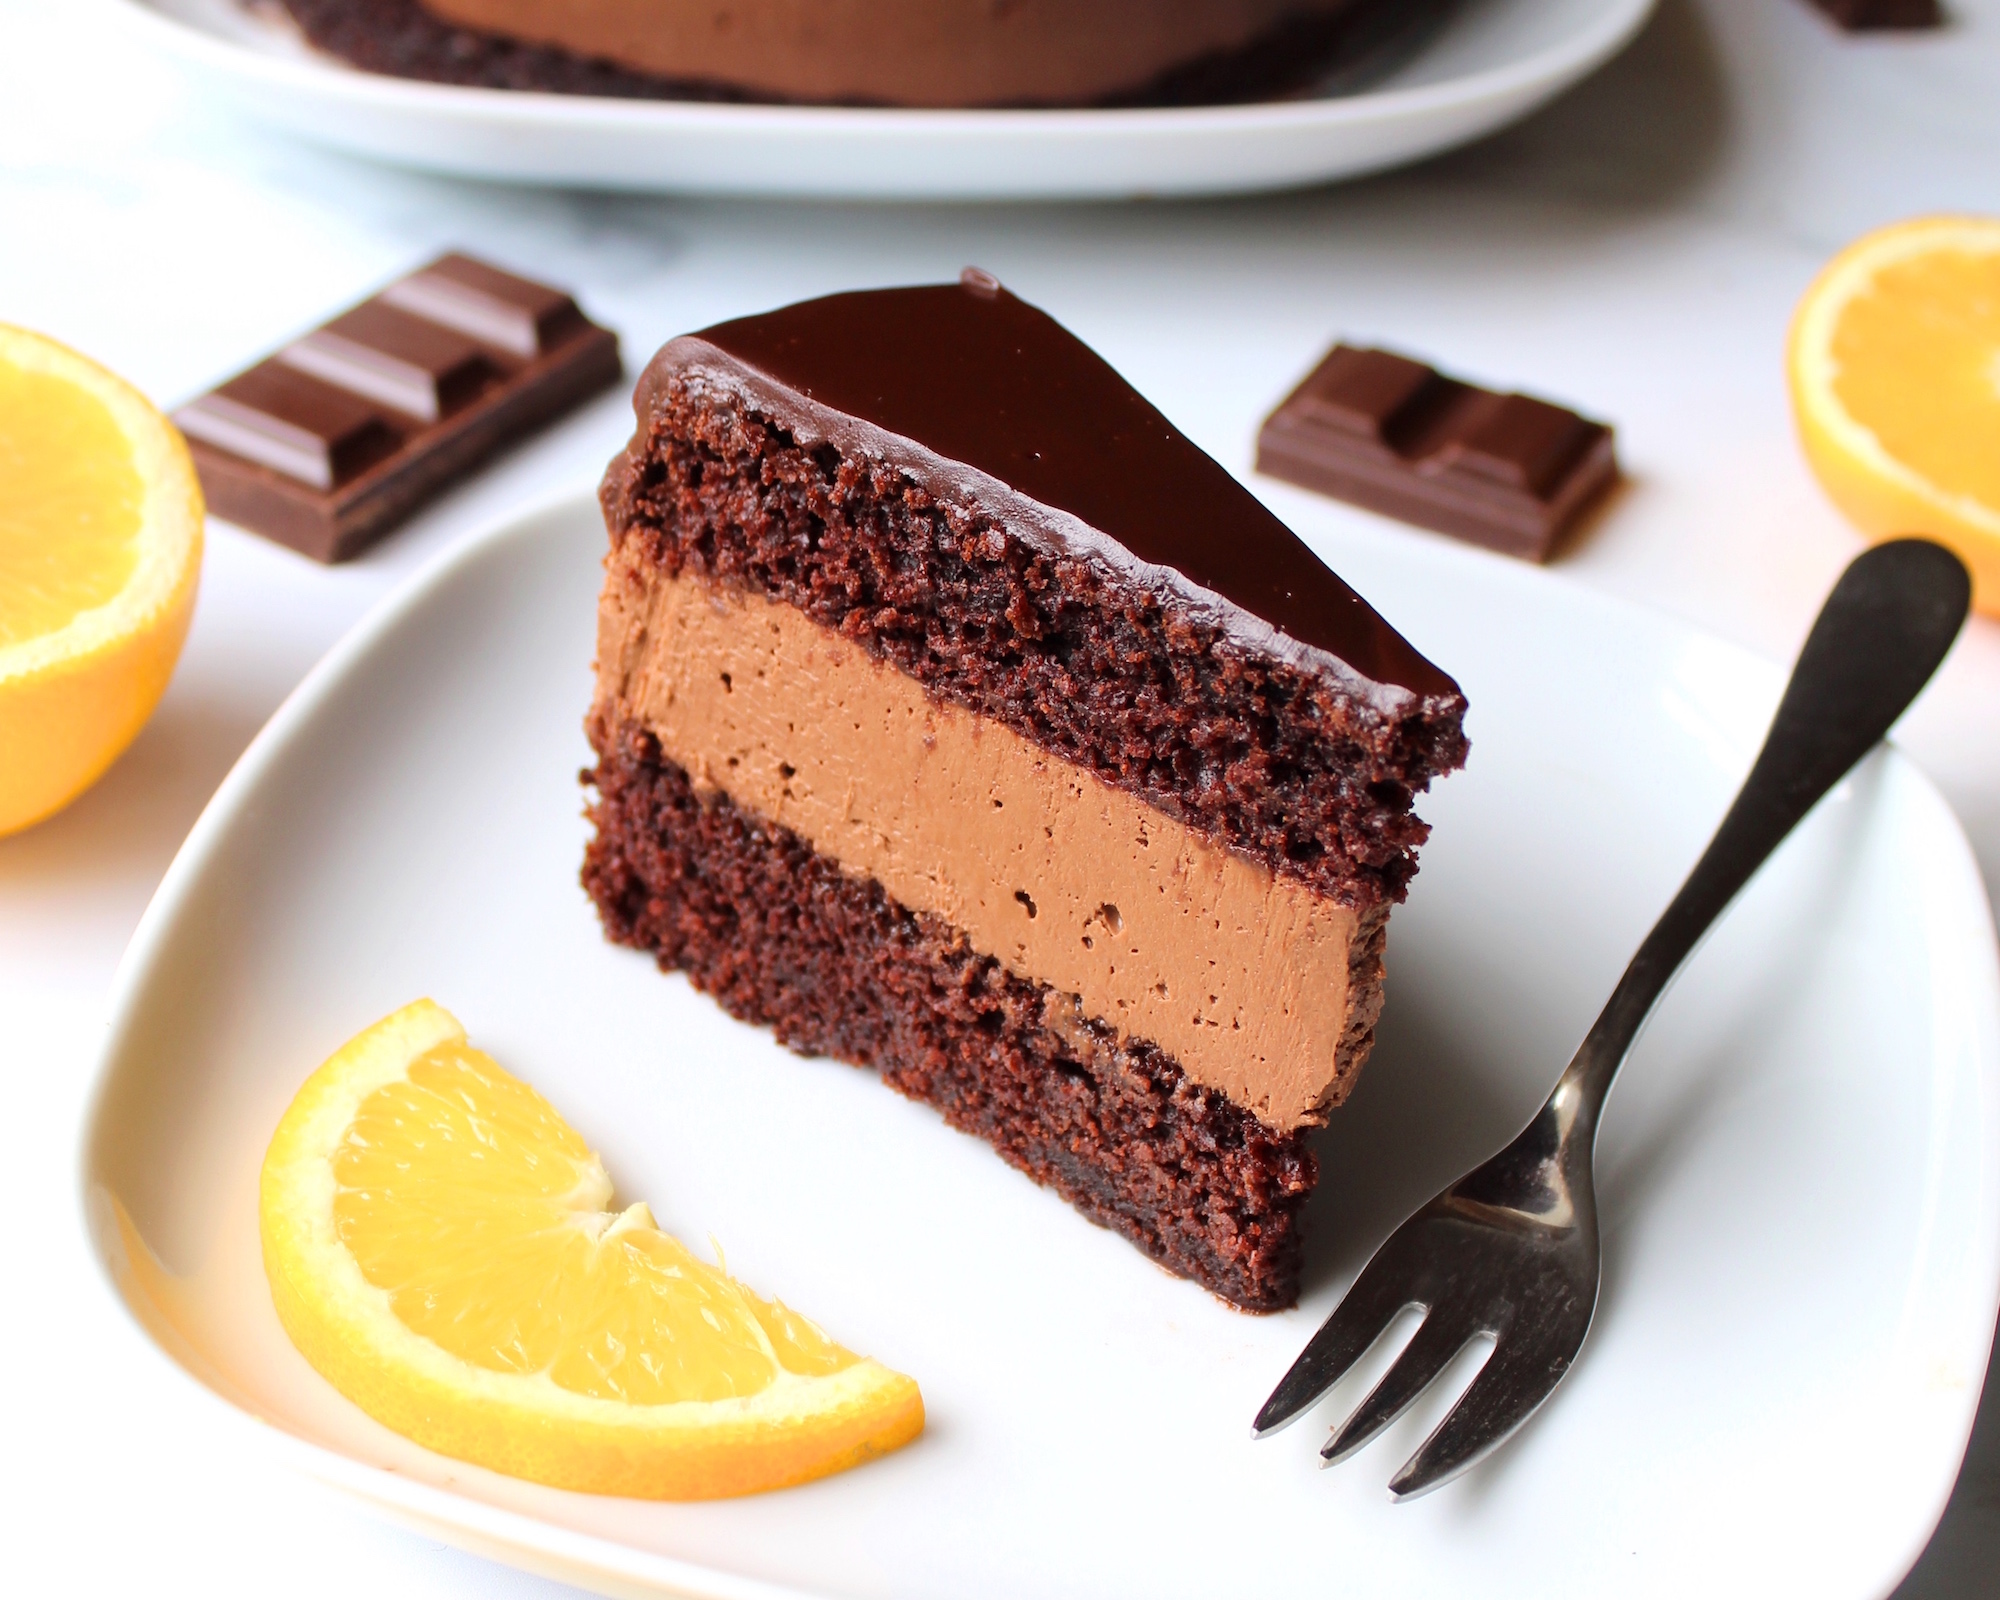
Silky, creamy chocolate orange mousse sandwiched between two moist and spongey layers of vegan chocolate orange cake. This showstopper cake is guaranteed to please vegans and non-vegans a like!

Ingredients
- Cake ingredients:
- 280g All-purpose (plain) flour
- 280g granulated sugar
- 35g cocoa powder
- 1.5 tsp baking soda
- ½ tsp salt
- 200ml soy milk (warm)
- 100ml orange juice
- 1.5 tbsp apple cider vinegar
- 120g vegetable oil
- 1 tsp vanilla extract
- 2 tsp orange extract
- Mousse:
- 400g silken tofu
- 400g dark chocolate, chopped,
- 150ml orange juice
- 1 tbsp maple syrup
- 2 tsp orange extract
- Ganache layer:
- 100g chocolate
- 100g soy cream or milk
Directions
- Step 1 Cake layers: Pre-heat the oven to 180C.
- Step 2 Sieve together all the dry ingredients (flour, sugar, cocoa powder, baking soda, and salt) in a large mixing bowl.
- Step 3 Warm up the plant milk. 60 seconds in the microwave should be enough.
- Step 4 Add the apple cider vinegar to the milk to make a “buttermilk”. Leave to curdle for 10 minutes.
- Step 5 While you wait, line your 8-inch loose bottom cake tin with parchment paper.
- Step 6 Add the remaining wet ingredients (orange juice, vegetable oil, and orange/vanilla extract) to the buttermilk.
- Step 7 Create a well in the dry ingredients and pour the wet ingredients in. Whisk together until fully incorporated. Be careful not to overmix.
- Step 8 Pour the cake batter into the cake tin and put in the oven for 40-45 minutes. Use a toothpick at the 40-minute mark to see if it is cooked (should come out clean after a few pokes).
- Step 9 Take out of the oven and leave to cool for a few hours.
- Step 10 Once cooled, take the cake out of the tin and, using a wire cutter or serrated knife, cut the cake into two even layers.
- Step 11 Leave one layer in the base of the cake tin, ready for the mousse to be poured on top.
- Step 12 Mousse layer: In a food processor, add all the ingredients except for the chocolate (silken tofu, orange juice, orange extract, vanilla extract, maple syrup). Blitz until smooth.
- Step 13 Melt the chocolate using a bain-marie or in the microwave using 30 second bursts.
- Step 14 Pour the melted chocolate into the food processor and blitz until it’s full incorporated.
- Step 15 Pour the mousse onto the bottom cake layer in the tin. Place the cake tin in the fridge for 1-2 hours to set (or speed up the process by putting it in the freezer for 20 mins).
- Step 16 Place the top cake layer on the mousse and leave the whole cake to set in the fridge for at least 1 hour.
- Step 17 Ganache: Meanwhile, heat up the soy cream or milk in saucepan on low heat. When it starts to simmer, pour it onto the 100g of chocolate and set aside for 5 minutes to melt.
- Step 18 Carefully take the cake out of the loose bottom cake tin and pour the ganache layer on top of the cake.
- Step 19 Cut and serve!


I’m very excited to try this, this christmas. I have to make a vegan diabetic friendly item and I think I can make this close enough for the diabetic to not spike his blood sugar into the atmosphere. I’m planning to toss in some winter spices as well. Any recommendations for a sweetener?
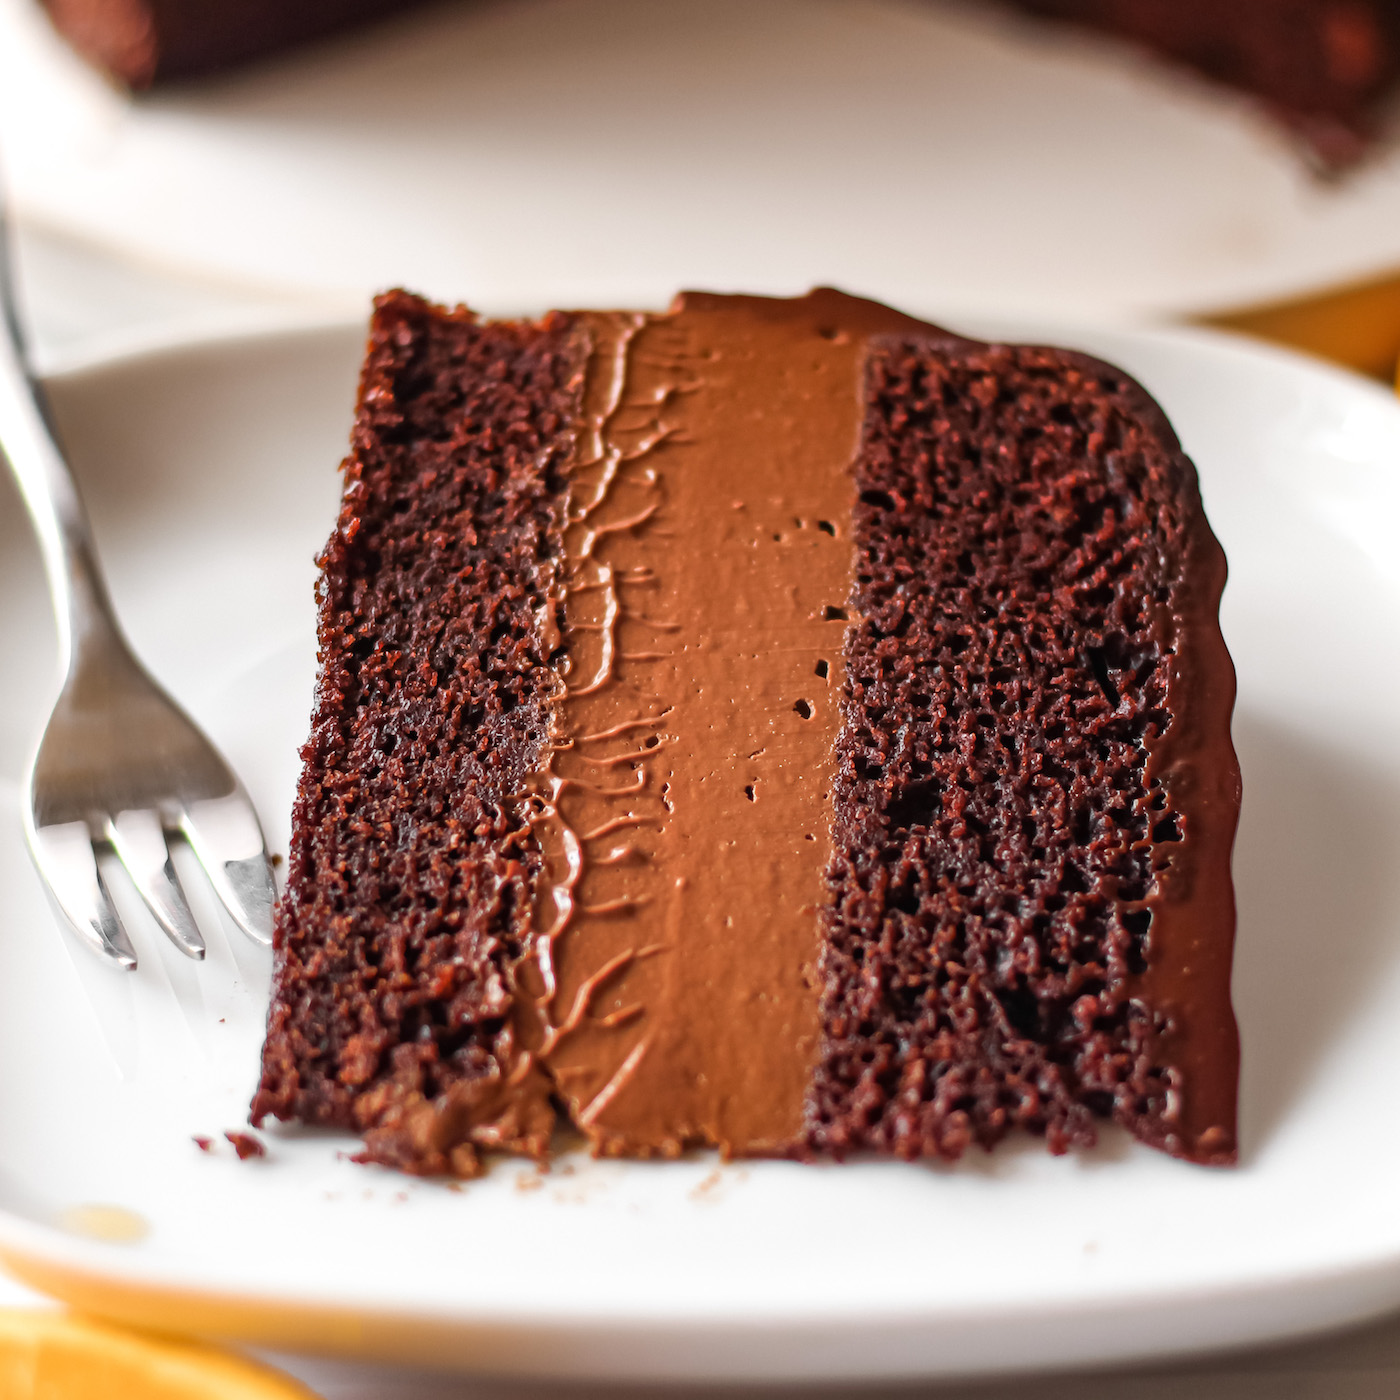
I made this recently and was so pleased with how it came out. The mousse layer really held it’s shape but still had a great light mousse texture. Really good orange flavour throughout. The chocolate cake was moist and delicious. I made the whole thing one day, kept it in the fridge, then did the ganash the next day a few hours before i served it. Would definitely make again.
Do you think the mousse would work with vegan white chocolate and subbing the orange juice for plant milk? I know white chocolate is often a little softer so wasn’t sure if I should reduce the liquid.
Hi Ali! Yes you can use white chocolate instead. You’re correct – white chocolate is a little softer so reduce the liquid a little if preferable but I’ve tried it using a 1:1 substitution and it still held up!
My family aren’t fans of orange and chocolate (I love it though), but with the abundance of blackberries now – do you think a blackberry mousse would be possible? Just use fresh blackberry juice (strained) instead of orange? Do you like a blackberry extract would still be needed?
Hi Melanie! I don’t see why not!! The colour might go a bit funky but it’s the same chemistry so it will work. You can swap the orange extract for vanilla or leave it out! Tom
I’ve made this cake around 4 times now – it’s a firm favourite.
I love the fact that you can build it all in the tin in which you bake the cake!
It’s also very versatile in that you can sub the orange juice/orange extract for something more neutral like soy milk to make a plain chocolate cake, which I have done on a smaller scale for family who don’t like chocolate orange.
I would really recommend everyone try making this cake at least once – I’ve certainly passed on the recipe to numerous people, once they had tried some
Thank you so much for the lovely feedback and rating! I also love that it’s an all-in-1 tin kind of bake! I love when desserts look difficult but are super easy!
Hi! Is it possible to add cocoa powder to the mousse for an intensest flavour?
Hi Brenda – yes absolutely! Just make sure it gets fully blended so there are no chunks of powder in the final piece.
Thank you for answering and for this amazing recipe! 🙂
Can this be made in advance and kept in the fridge? I have an event on Tuesday but would be wanting to make it on the Sunday.
Hi Eleanor! Yes it can! I would recommend making the cake + mousse part first, covering that in plastic wrap, storing that in the fridge Sunday night and then add the ganache coating in the morning on the day. You could put the ganache on in advance but it’s harder to wrap up (you can use air tight containers but this cake is BIG), and sometimes chocolate starts to misbehave if exposed in the fridge for too long (it can bloom, crack, etc.!) Good luck!
Is it possible to substitute a different liquid for the orange juice to get a more pure chocolate flavor?
Hi Bridget! Yes absolutely, use a neutral plant milk for a pure chocolate flavour.
With what we can replace silk tofu in mousse? Homemade cheese ? please reply
Hi! I’m afraid silken tofu is the core ingredient here. It might possibly work with cream cheese or whipped heavy cream but I can’t be certain. Tom
Hi what can i use instead of tofu n soy milk .. non vegan version
Thank you for providing a link at the top taking us directly to the recipe. VERY much appreciated 🙂
My pleasure!!
Hi, has anyone tried to make this cake with gluten free flour yet?
I’m hoping to make it tomorrow for my husband’s b-day. I’ll let you know how it went.
The instructions are very clear, precise and easy to follow. The cake is mind blowing!
Hi wht can b a substitute gir silken tofu n can v use d regular synthetic vinegar. The rvp looks amazing
Made this cake last week and it was amazing. Very rich and decadent. I tried it because the recipe looked super easy with a beautiful payoff and boy was I right. It’ll be a staple in my house for sure
Enjoyed this cake a lot, thank you for the recipe! The tofu mousse is amazing, just wondering how it looks so orange in your pictures? The one I made is just light brown 🤔🙂
Hi! Sorry for the slow response I was away on holiday! Hmm I’m not actually sure. Might depend on the differences in orange juice used or the chocolate! I suppose photography also plays a part – I probably warmed up the photo to bring out the colours in the decoration and it may have lightened the filling! Thanks for the feedback 🙂
I didn’t have to make the whole cake but I tried the silken tofu mousse by itself and it was great! Added some cointreau too
It looks so good! Do you think the mousse will hold up well after it’s been in the freezer? Or do you think it will then deflate?
Hi! Since there’s no meringue or whipped cream it’ll be absolutely fine in the freezer! Just remember to really whizz it together in a blender to aerate it as much as possible before you pour it into the cake tin to set!
The mousse and the ganache both look so perfect. I mean, the cake, too. But that mousse!
Thank you so much!! I was pretty happy with how this shot came out!
Omg me and my daughter just made this and it was just perfect! Didn’t look as beautiful as yours but still tasted amazing !!
Wow that was quick I just posted it haha! Thank you so much for trying and the great feedback!