
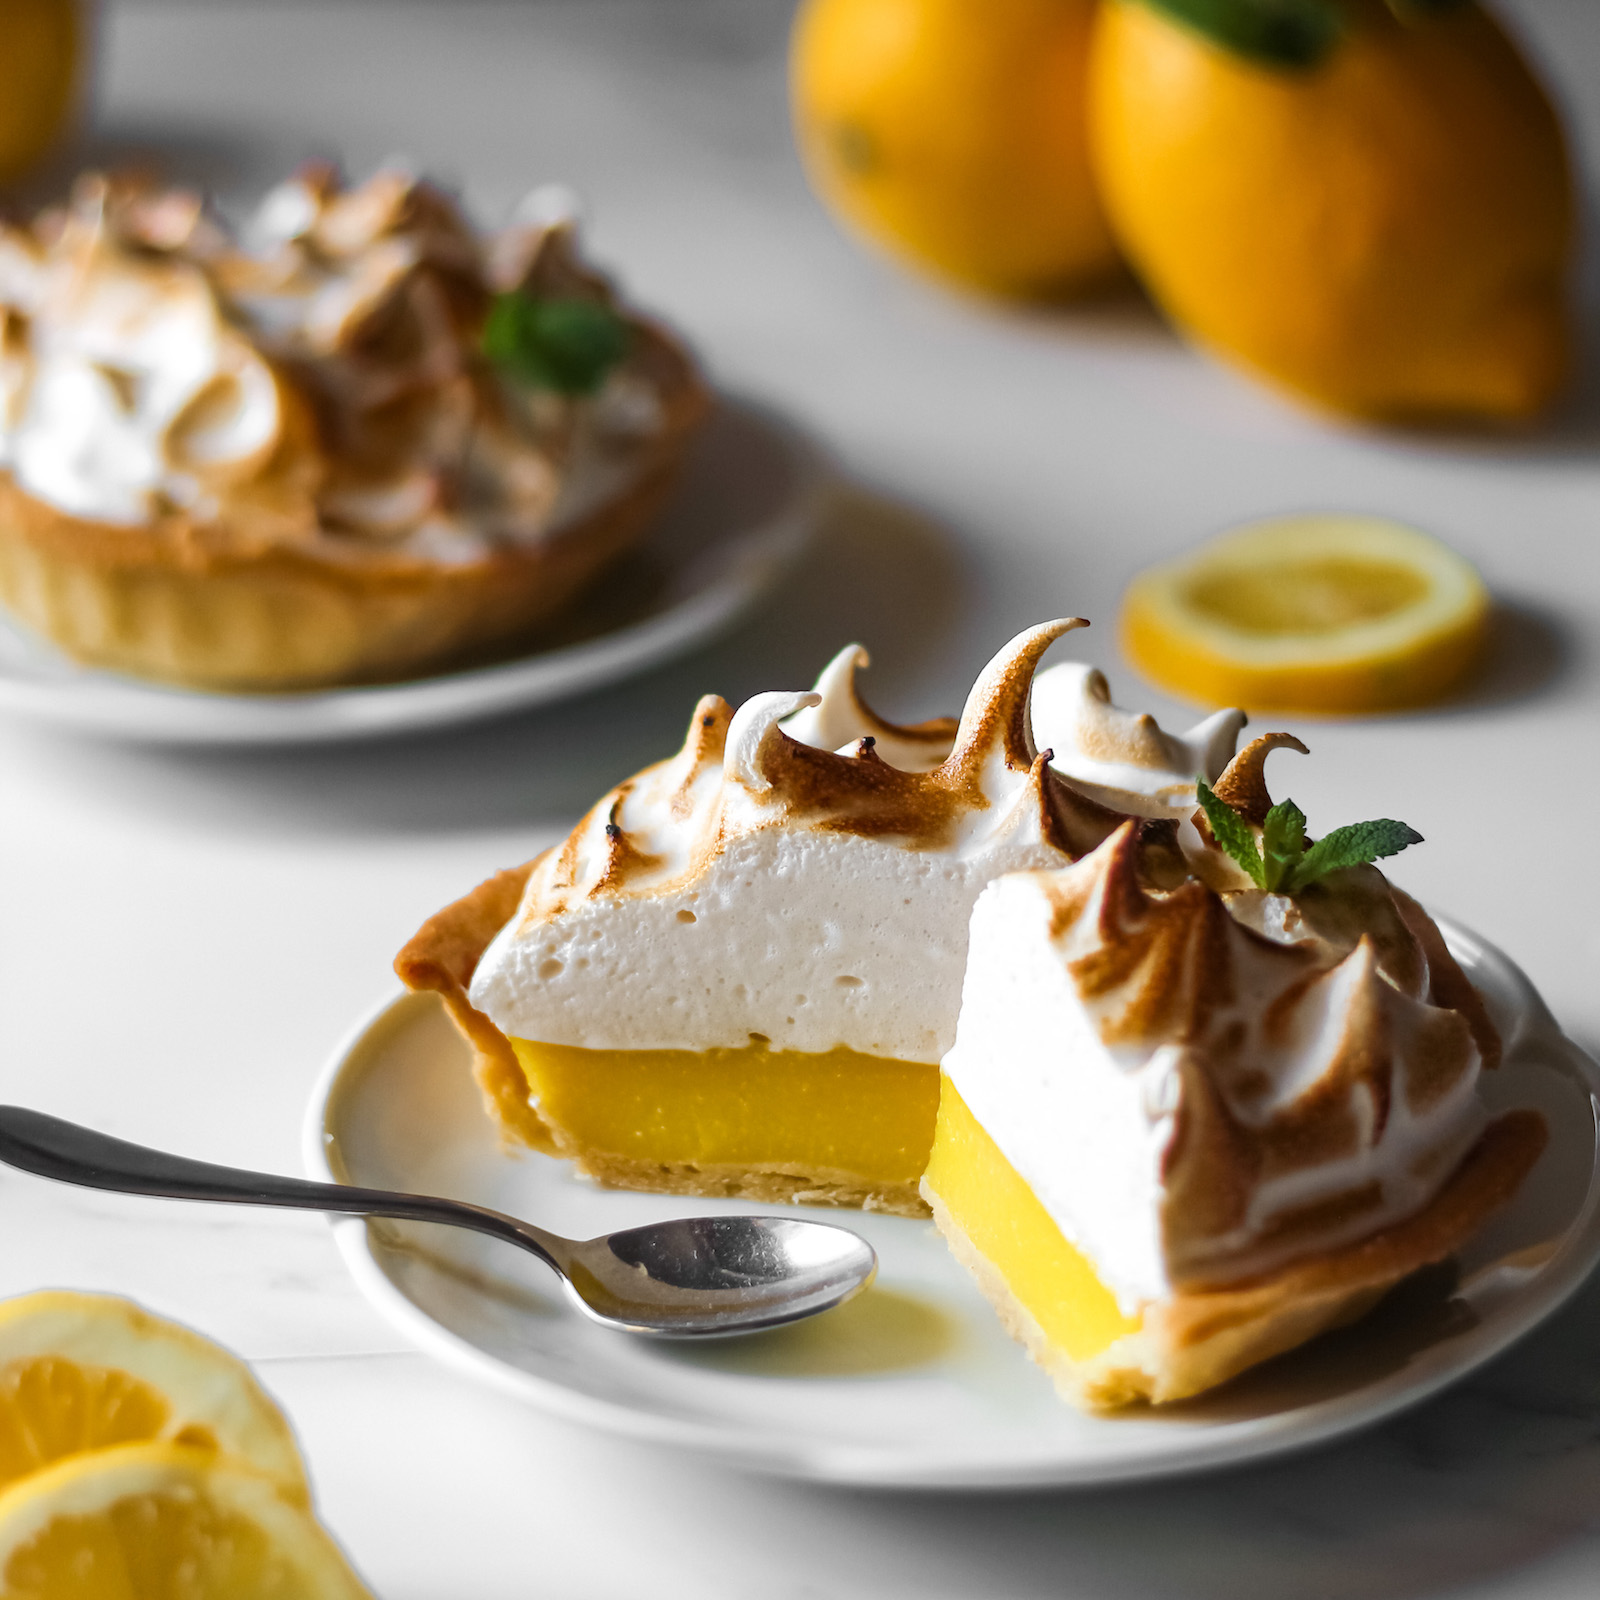
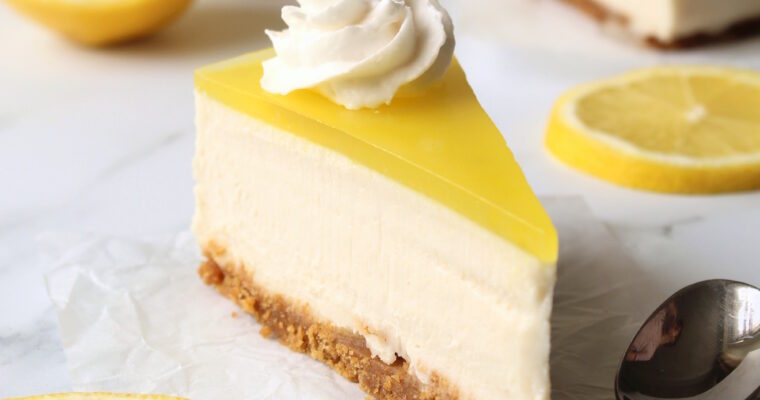
This vegan lemon meringue pie has all the beautiful qualities of the classic recipe – crisp pastry, beautifully tart lemon curd and a fluffy, toasted meringue to finish it all off. Lemon meringue pie is one of my all time favourite desserts so I absolutely had to have a vegan version!
Hi friends! Welcome to my lemon meringue pie recipe! I feel that greetings are essential here because this is an absolutely mammoth of a recipe so we’ll be getting super comfy going through all the trials and tribulations together. You’ll find a few variations of vegan lemon meringue pies online and they are all great in their own way but in my opinion the following elements must be adhered to:
- super lemony, zesty curd (using real lemons)!
- pie crust has to be buttery, flaky and a little salty!
- meringue has to be sturdy yet fluffy and not “melt” or “droop” over time.

Before I start I will quickly list the essential tools for this bake:
- sugar thermometer (for the Italian meringue)
- accurate scales
- 10 inch pie dish/flan tin
- stand mixer/electric whisk
- baking beads (or dry lentils/rice)
- rolling pin
Although this recipe only has 3 elements, each of them of presents their own challenges. The pastry is relatively simple but it takes some time to prepare; measuring ingredients, mixing, working into a dough, chilling, rolling out, chilling again… you know the drill! Skip to the end of these recipe notes for a photo tutorial.
This is my go-to flaky crust recipe for most pies, tarts, etc.! If you want it to be extra flaky then I recommend adding a tablespoon of vinegar when you add the water. The vinegar will completely evaporate but hopefully leave some nice layers. See the above photo for how flaky this crust gets when you make it right! It’s a little bit of fuss but I wanted the crust to be as indistinguishable from a non-vegan crust as possible and to be comparable to a quality pastry shop pie. If you’re curious about my other pie recipes then click here to look through my pie archive!
If you’re trying to save time there are plenty of shop-bought crusts available (at least in the UK/Europe), such as this Jus-rol short crust pastry that is naturally vegan!
The hardest of the 3 elements is the meringue topping. Unlike egg whites that always have the same consistency when you crack the egg, aquafaba can come in many forms. Firstly, you can use aquafaba from almost any canned legume; chickpeas, haricot beans, red kidney beans, etc.! I like to use chickpeas because I have the most experience with them and I like making hummus and falafel!
Secondly, the viscosity of the liquid will vary between cans. For this kind of recipe we want a stiff and sturdy meringue so we need to mimic an egg white as close as possible. Egg whites are viscous, gelatinous and gloopy so to get something similar we can reduce the aquafaba down on a low-heat on the hob for 10-15 minutes and leave to chill. This will cook out a lot of the water and will leave a thicker and heavier liquid.
Lastly, to prevent the meringue from drooping, we will be using the Italian meringue method. As a reminder these are the three ways to make a meringue:
- French: Sugar poured directly into whipping aquafaba (or egg whites)
- Swiss: Sugar melted into liquid aquafaba over heat and then whipped up together once chilled
- Italian Hot sugar syrup poured directly into whipping aquafaba
These are in order of increasing stability. The Italian meringue is ideal for our case because the hot sugar syrup will harden when cool (the same way that hot sugar syrup will stiffen into a firm ball once cool) and create structure. I left my pie in the fridge overnight completely exposed and the meringue had no issues.
To replace the eggs in the filling, we will use cornstarch as a thickening agent/stabiliser combined with the plant-based cream. The soy cream replaces the fat and richness that the egg yolk would otherwise be providing. Another option if you don’t have access to soy cream is to use coconut cream. Place a can of coconut milk in the fridge overnight and then collect the thick cream that collects at the top. I find that the strong lemon flavour completely masks the coconut flavour.
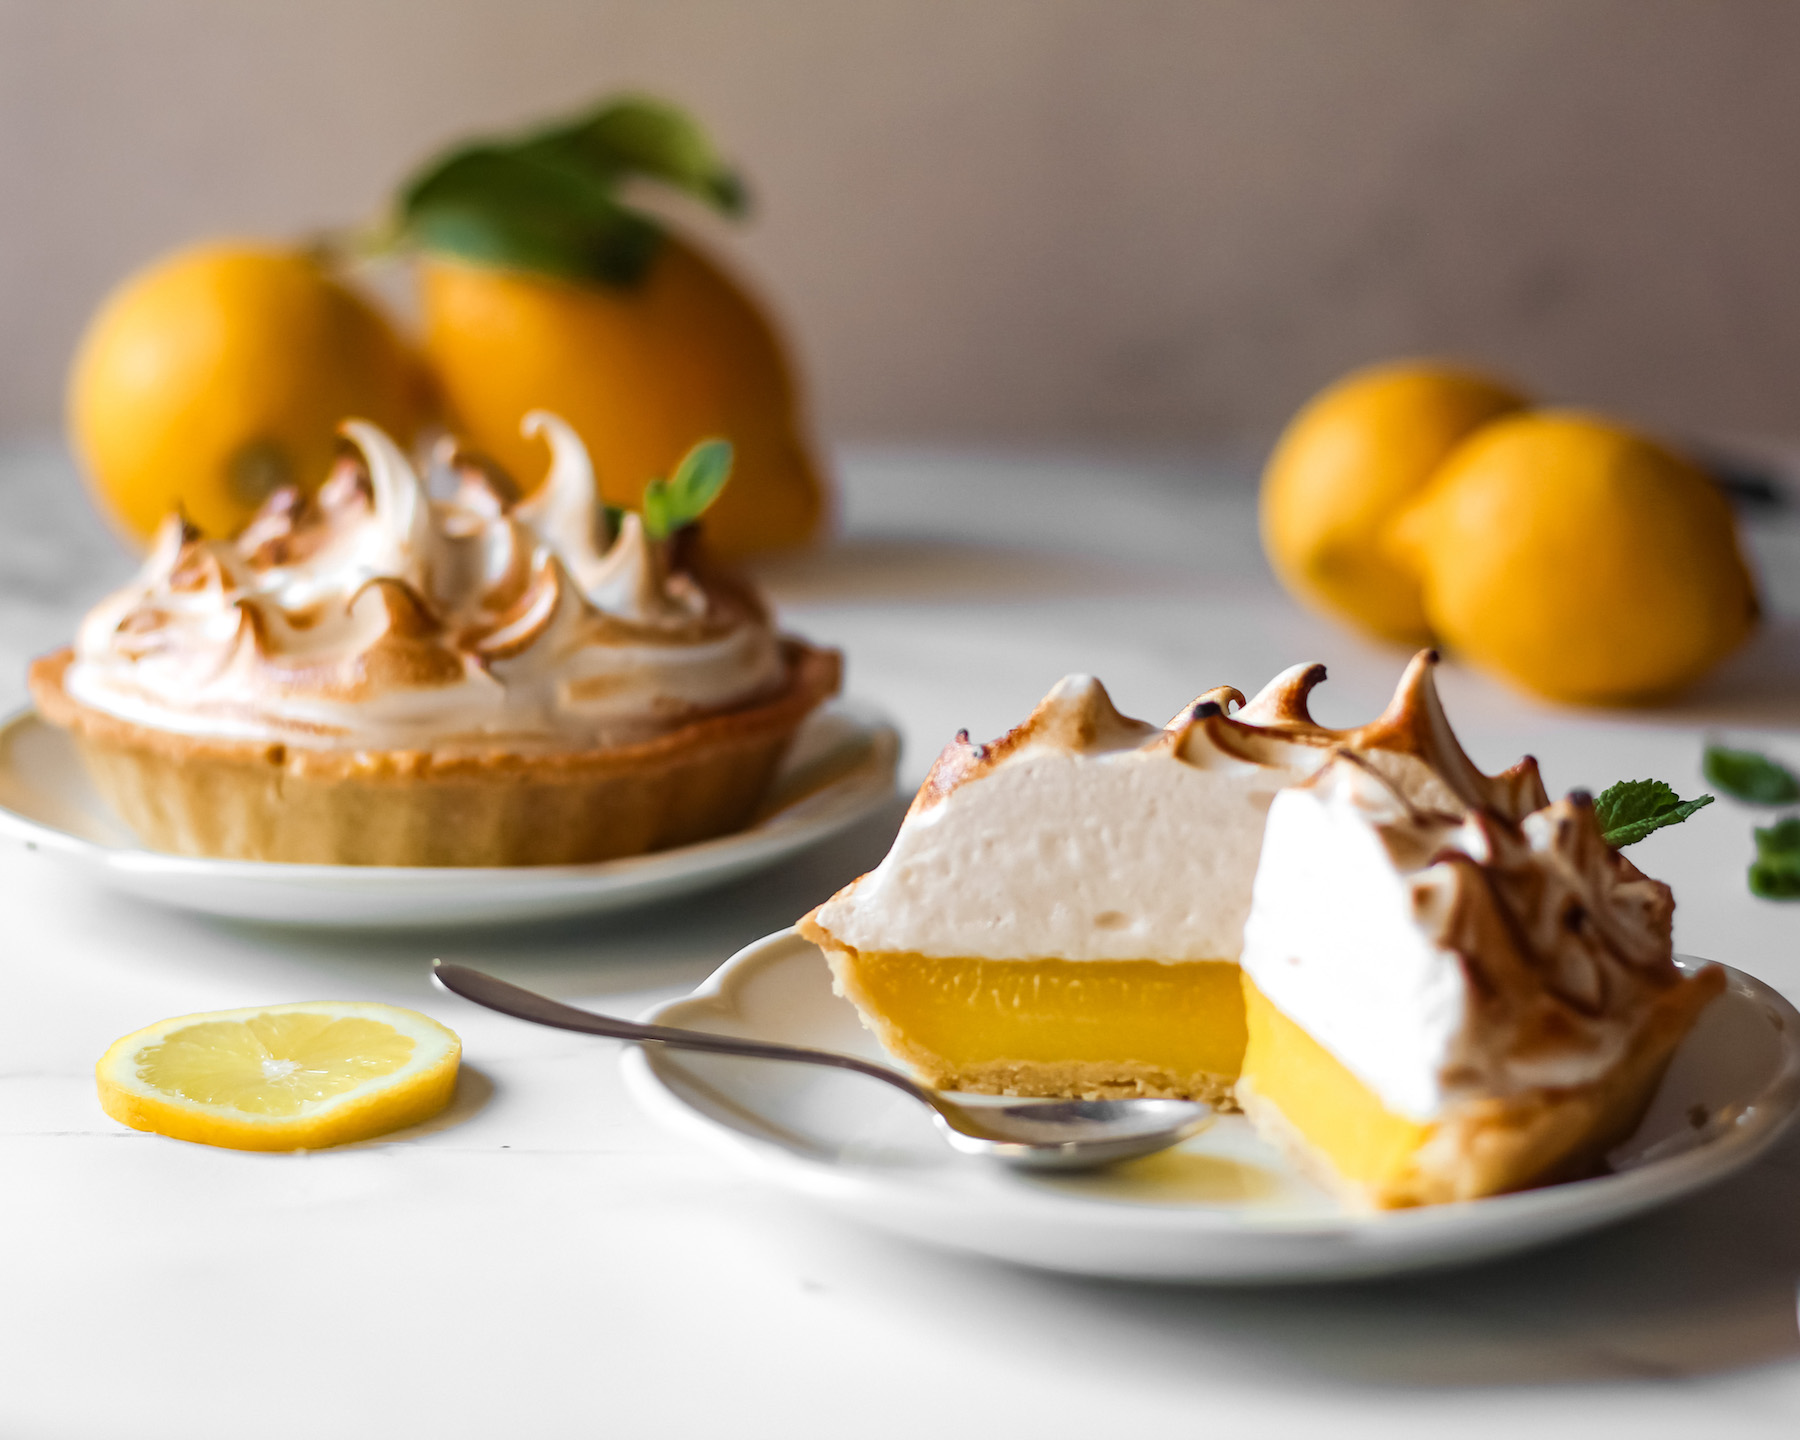
One important note – I used a few different tart sizes for the various photos on this page. The recipe is designed for a 10-inch tart tin. However I have used an 8 inch tart tin in some of the photos so that I can achieve that mountainous, towering meringue on top. Another option is to use 3-4 smaller 5-inch pie dishes. I quite like doing smaller ones because then they are serving size and if you’re clumsy like me and break one, you’ll still have 3 other perfect ones!
Onto the recipe!
Vegan sweet shortcrust tutorial:
Sieve together the flour, sugar and salt in a mixing bowl. Add chilled, chopped butter to the bowl.
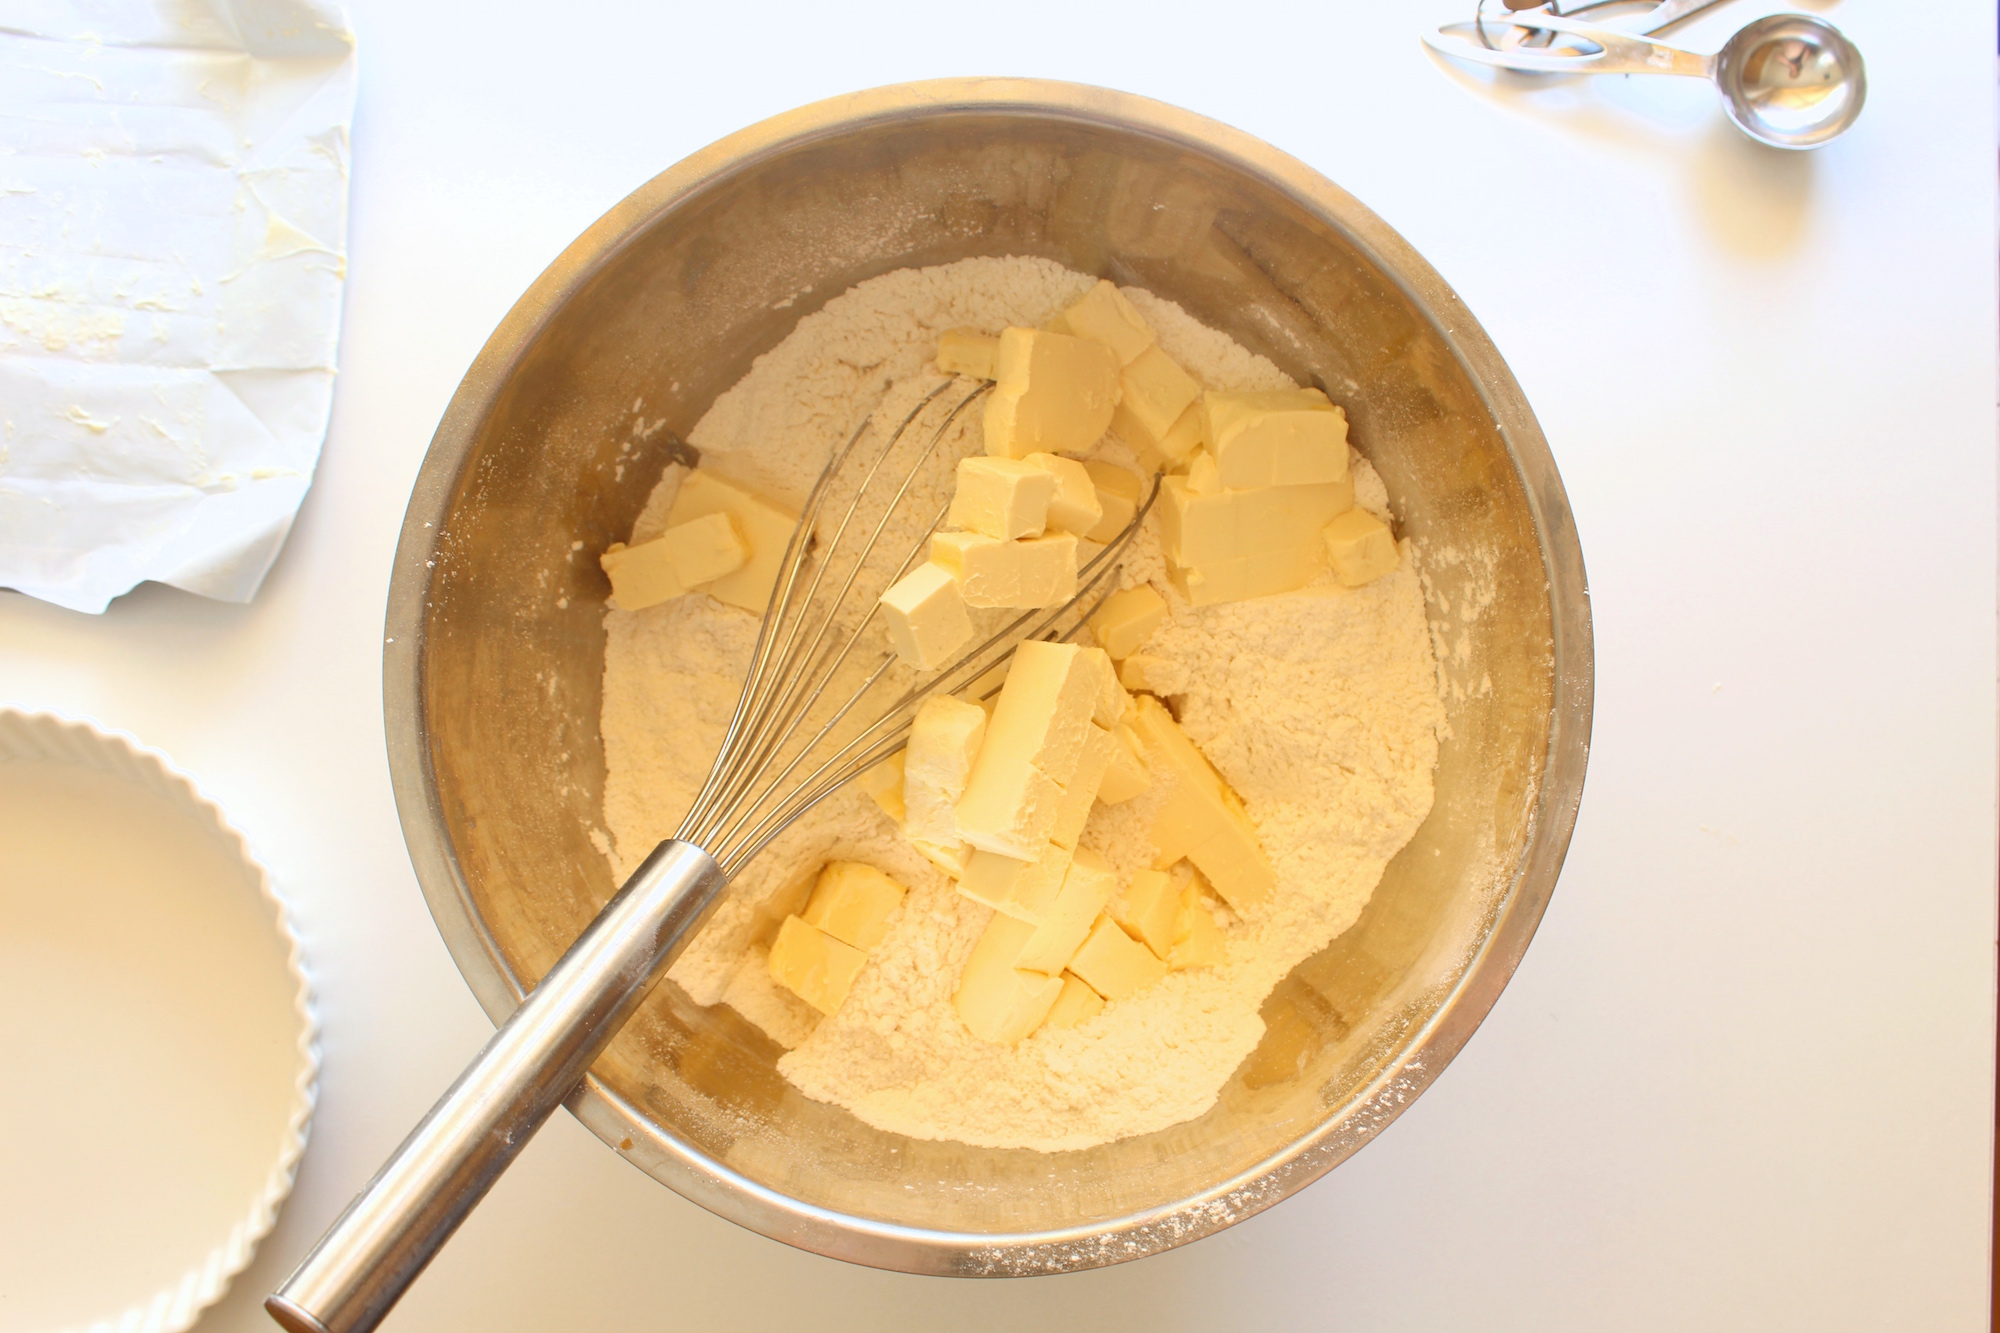
Using a cold metal whisk, mix together the butter and flour until it resembles bread crumbs. Do not take too long as we don’t want the butter to melt into the flour. Chunks will stick the whisk but persevere through the exercise and with some elbow grease you’ll eventually get there!

Add the ice cold water to the mixture and mix together with a wooden spoon until the mixture is completely homogenous and comes together in ball. Try not to handle the pastry too much.
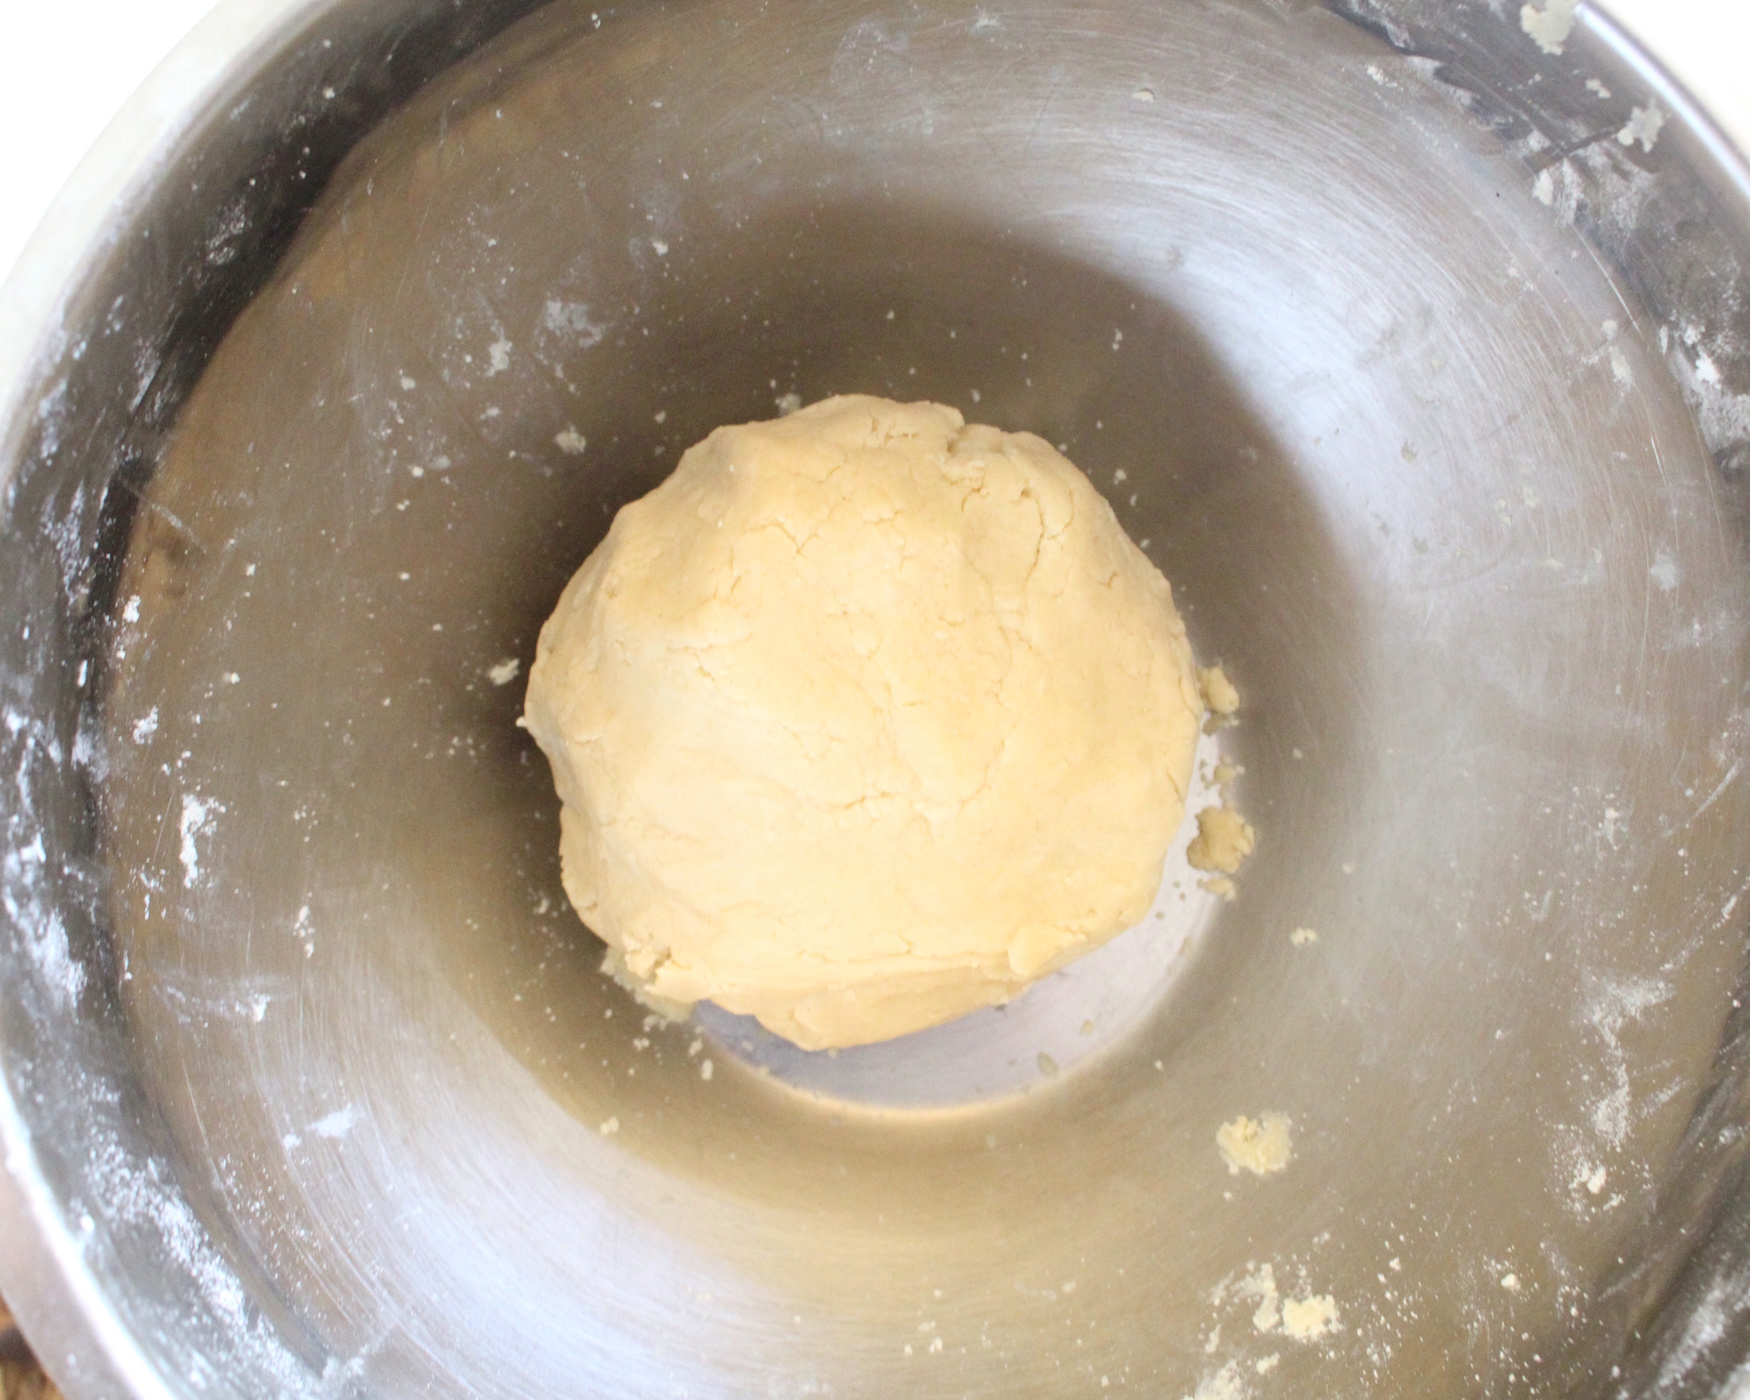
Wrap the pastry in clingfilm or foil and chill for 30 minutes. Meanwhile, flour a clean surface with flour and get your rolling pin ready!
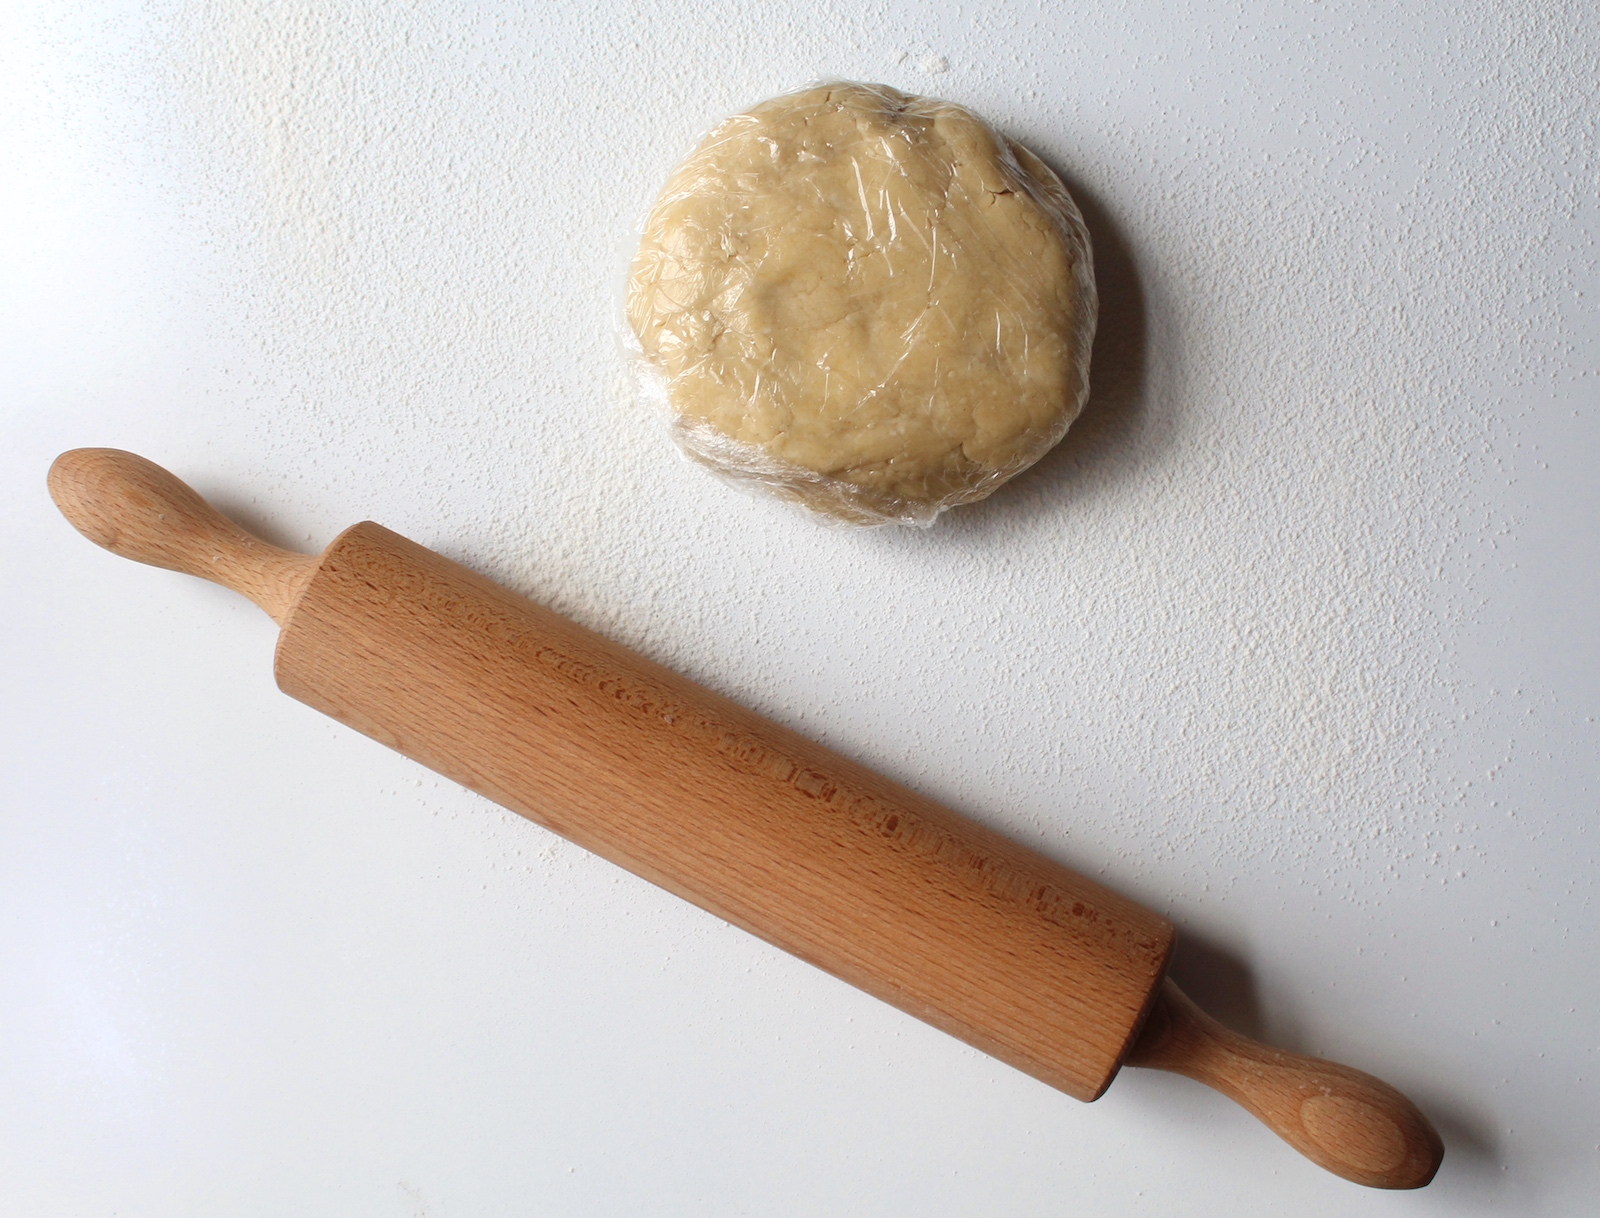
Take the pastry out of the fridge and start beating it with the rolling pin to loosen it up. Try to avoid causing large cracks in the pastry. If it is cracking too quickly it may be too cold – wait 3-5 minutes for it to soften slightly. Now roll out the pastry to 3mm thick. The best way to roll it out is to roll across the whole disk with the rolling pin and then rotate it 45° and roll again once. This way the whole pastry should be one even layer.
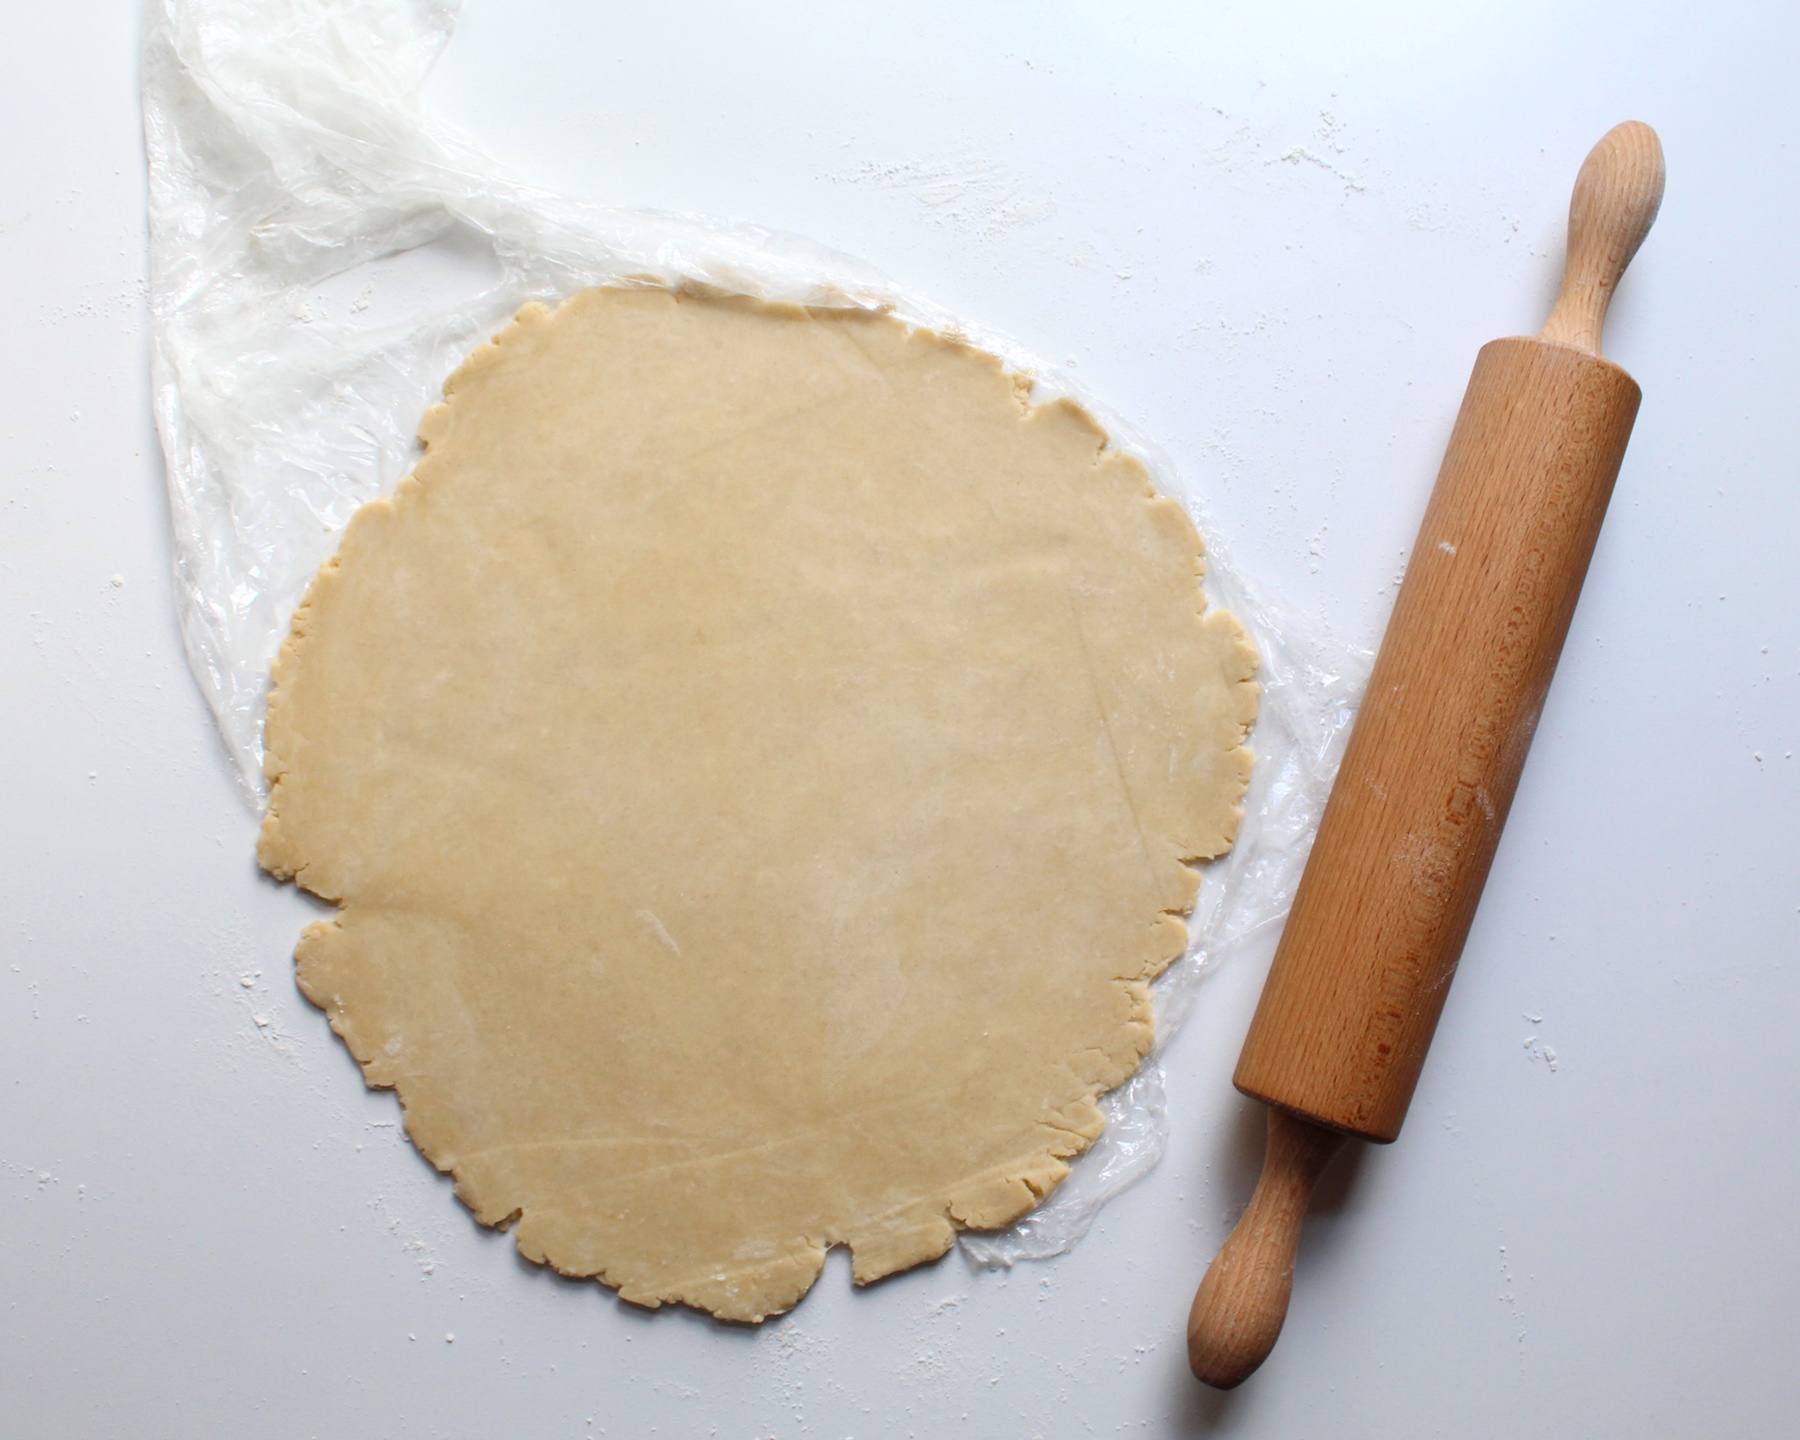
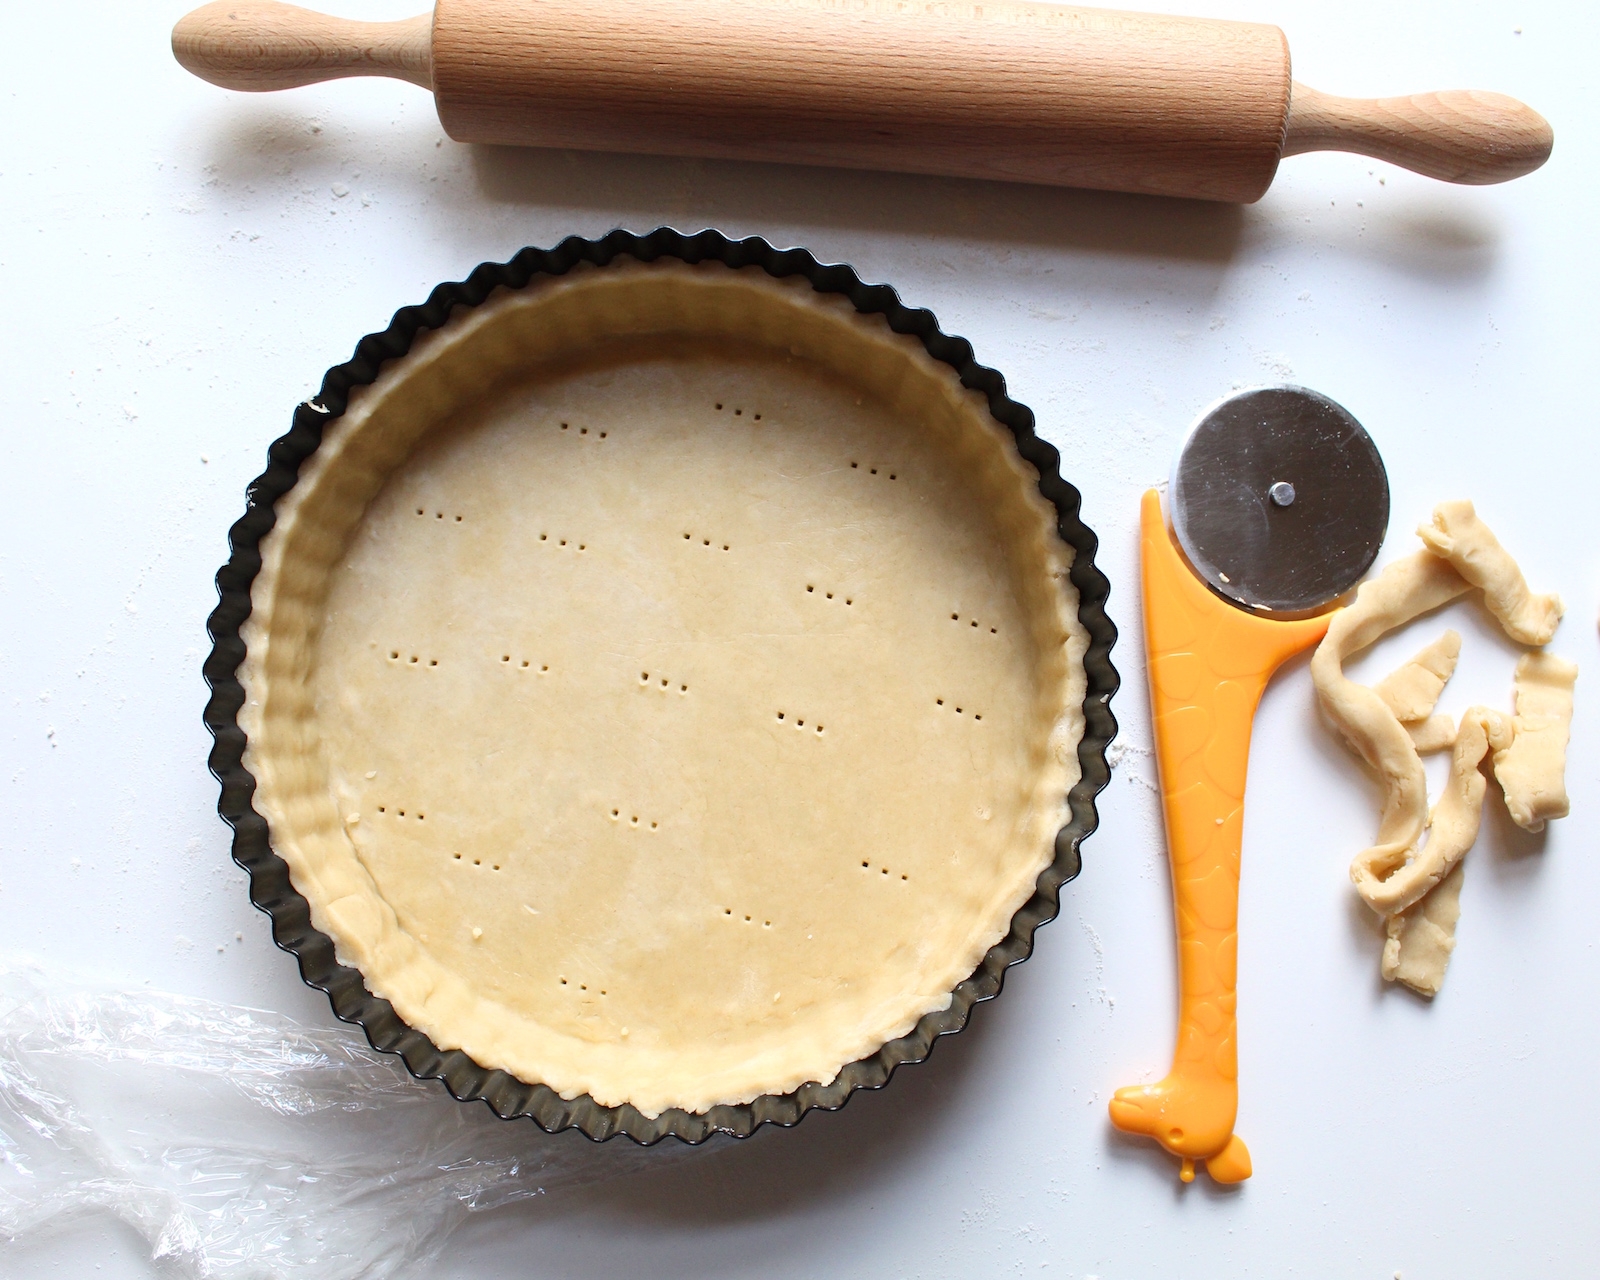
Once the pastry is thin enough, flop the pastry over the rolling pin and place it into your pie dish or flan tin. Gently push it down into all of the corners and use your thumbs to press the dough against the walls of the dish. Using a knife or pizza cutter, cut away any excess dough so you’re left with a clean 1.5 inch deep crust base.
Poke a few holes in the crust with a fork to prevent bubbles when baking. Cover this with clingfilm again and place back in the fridge for 20 minutes. Pre-heat the oven to 160C.
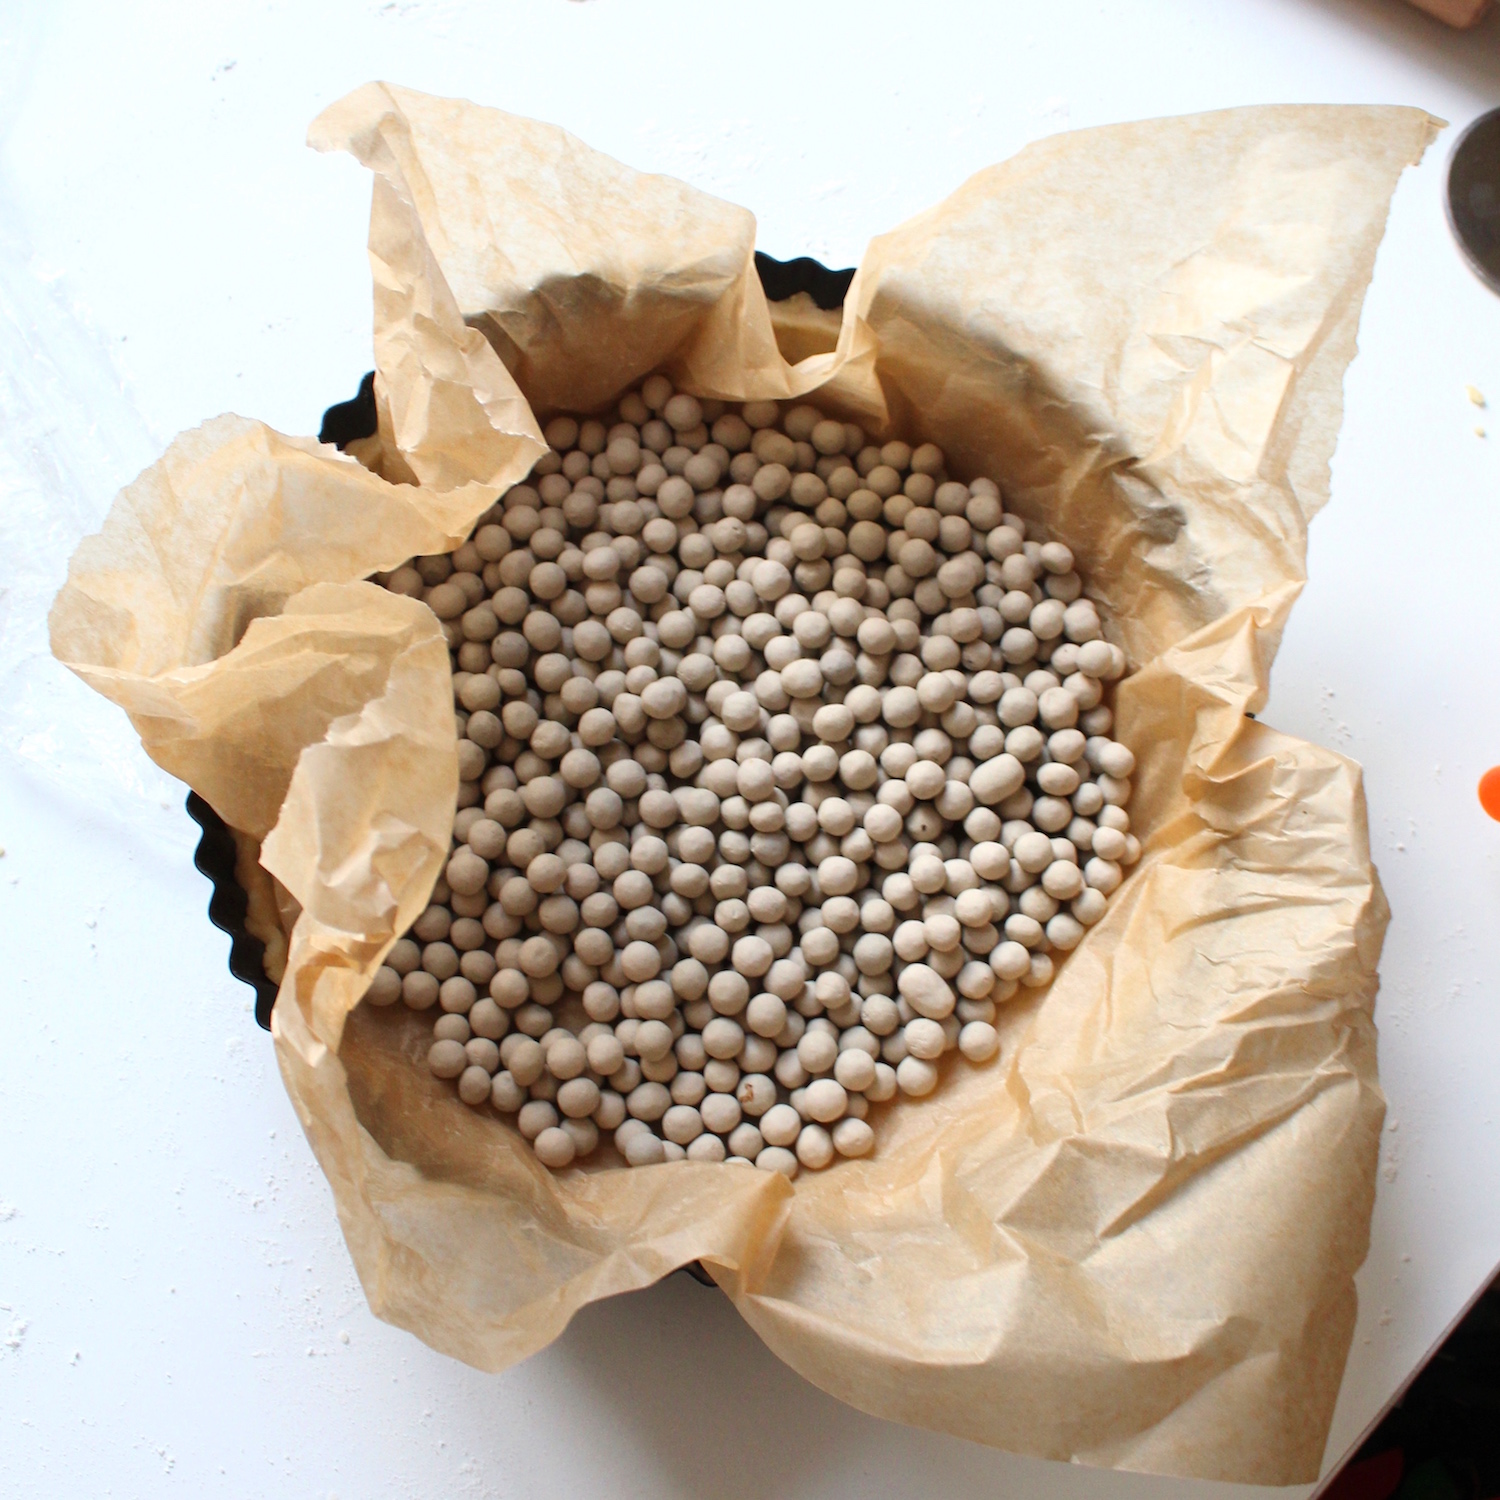
After 20 minutes, place a layer of parchment on top of the pie crust and weigh it down with baking beads. Bake for 20 minutes. After 20 minutes, take it out and remove the baking beads and parchment. Bake for a further 15 minutes until golden.
Vegan Lemon Meringue Pie
Classic zingy and sweet lemon meringue pie made vegan! This knock-out dessert is an absolute crowd pleaser!
Ingredients
- Pie Crust
- 250g flour plus extra for dusting
- 150g vegan butter (and extra for greasing)
- 2-3 tbsp cold water
- 2 tbsp icing sugar
- ½ tsp salt
- Lemon Filling:
- 160ml lemon juice (~4 lemons)
- lemon zest (2 lemons)
- 240ml soy cream.
- 200g caster sugar
- 1.5 tsp agar agar powder
- 3 tbsp (25g) of cornstarch
- 60 ml plant milk (I used soy)
- (optional) 1 drop yellow food colouring (I used gel colouring)
- Meringue:
- Water from 2 tins of chickpeas (~300ml) reduced down to 150ml. Do this in advance.
- ½ tsp of cream of tartar
- 250g caster sugar
- 2 tsp agar agar powder
- 80ml of water
Directions
- Step 1 Pie crust: Add flour and butter to a mixing bowl and mash together with a cold metal whisk until it is the consistency of breadcrumbs (you can use your hands but your body heat might start to melt the butter).
- Step 2 Add the water and sugar and keep mixing/kneading until it is in a smooth ball of dough. Wrap this in cling film and rest in the fridge for 20mins.
- Step 3 While you wait, set up the tart tin by greasing it with the extra margarine and then coat it in a dusting of flour (using a sieve). Shake of the excess.
- Step 4 Cover a clean surface with a dusting of flour and unwrap the pastry. Use a rolling pin to roll the pastry out to about 3mm thick. I found it useful to place cling film over the pastry as I roll it towards the last part of the process.
- Step 5 Roll the pastry onto the rolling pin and drape over the tart case. Push the pastry into all corners of the case (delicately). Trim the edges and pre-heat the oven to 160C (325F).
- Step 6 Prick holes in the bottom of the pastry using a fork and then wrap case with cling film and rest in the fridge for another 20minutes.
- Step 7 Unwrap the pastry then get a piece of non-stick baking paper, scrunch it up a few times (this will help get into into the nearest corners) then put it on the pie crust. Weigh it down with ceramic baking beans/lentils/rice (I used lentils).
- Step 8 Bake in the over for 20 minutes. Remove the lentils/beans and then cook for another 25mins.
- Step 9 Take tart case out of the oven and let it cool while you work on the filling and meringue.
- Step 10 Filling: Mix the cornstarch and plant milk in a separate bowl.
- Step 11 Combine the rest of the ingredients in a pan and bring it up to heat. Add the cornstarch mix. Whisk frequently whilst cooking down the mixture.
- Step 12 After 10-15 minutes, you should notice the mixture thickening. Keep heating and stirring until the lemon curd is thick and bubbles slowly (it is essential to reach boiling point to activate the agar).
- Step 13 Take off the heat and pour it into the cold pie crust. Set aside to cool for 2 hours (or refrigerate for an equal amount of time but this can sometimes promote sogginess).
- Step 14 Meringue: Prepare the aquafaba in advance by reducing it from 300ml to 150ml by simmering on low heat on the hob for 15 minutes. I like to weigh my liquid before I cook it and then I check after 12 minutes to see how much further I have to go. Allow the aquafaba to cool for at least 1 hour.
- Step 15 Add aquafaba to a stand mixer with the ½ tsp of cream of tartar and set to medium-low. It should take 10-15 minutes to become soft peaks.
- Step 16 Meanwhile, place 250g caster sugar, 2 tsp agar powder and 80ml of water in a pan and bring to boil. Avoid mixing as much as possible because the sugar might crystallise. Use a candy thermometer to track the temperature. When it reaches 121C (250F), take it off the heat and slowly pour it down the side of the bowl into the whipped up meringue. Be careful not to let it splash.
- Step 17 Let the stand mixer run for a couple minutes more until the meringue mixture cools down.
- Step 18 Once mixture is glossy and thick, plop it onto the pie filling.
- Step 19 Leave it to cool down for ~20 minutes and then use a blowtorch to softly burn the meringue (or place it under the broiler).
- Step 20 Chill then serve.

What is the gel strength of the agar you use?
This lemon meringue pie was absolutely delicious! The lemon curd was so tasty and fresh. I was so impressed, and my non-vegan family also loved it!
This recipe is so good – thank you Tom! I did overcook the base a little (my oven’s a bit hot I think) but it’s still delicious. Using agar works really well and the flavours are just right.
I have just had my first taste of this and its really incredible. I’ve never made a vegan lemon meringue, but all the components before. I’m amazed at what a different the agar agar makes in the meringue. I’m sure it will be devoured by vegans and non vegans over the next few days. Thank you for a brilliant recipe that works!
Hi Gretha! I’m so glad you loved it. It’s one of my all-time favourite recipes and so easy to make vegan! Thanks for your wonderful feedback.
Hi there!
Yesterday I made your recipe. Oh , oh! so so good!
Was the first time I made aquafaba meringue after seeing plenty of recipes and decided to make yours because you was the only one that included agar agar in the ingredients. And that was the trick!
Thank you for sharing your experience in the kitchen.
Regards from Buenos Aires, Argentina !
My developer is trying to convince me to move to .net from
PHP. I have always disliked the idea because of the costs.
But he’s tryiong none the less. I’ve been using Movable-type on a variety of websites
for about a year and am nervous about switching to another platform.
I have heard excellent things about blogengine.net.
Is there a way I can transfer all my wordpress posts into it?
Any kind of help would be really appreciated!
I made this yesterday, despite being a bit intimidated by the idea if the amazingly fluffy meringue on the photos. The recipe is well explained and was easy to follow. The critics at work loved it, and was amazed that it’s vegan 😬. I made the dough 1:1 with gluten-free flour for a colleague, it worked perfectly. Thanks for sharing the recipe!
Hi Karen! Thanks so much for the feedback and the 5* rating, it really means a lot! So glad the gluten-free flour blend worked out for you!