
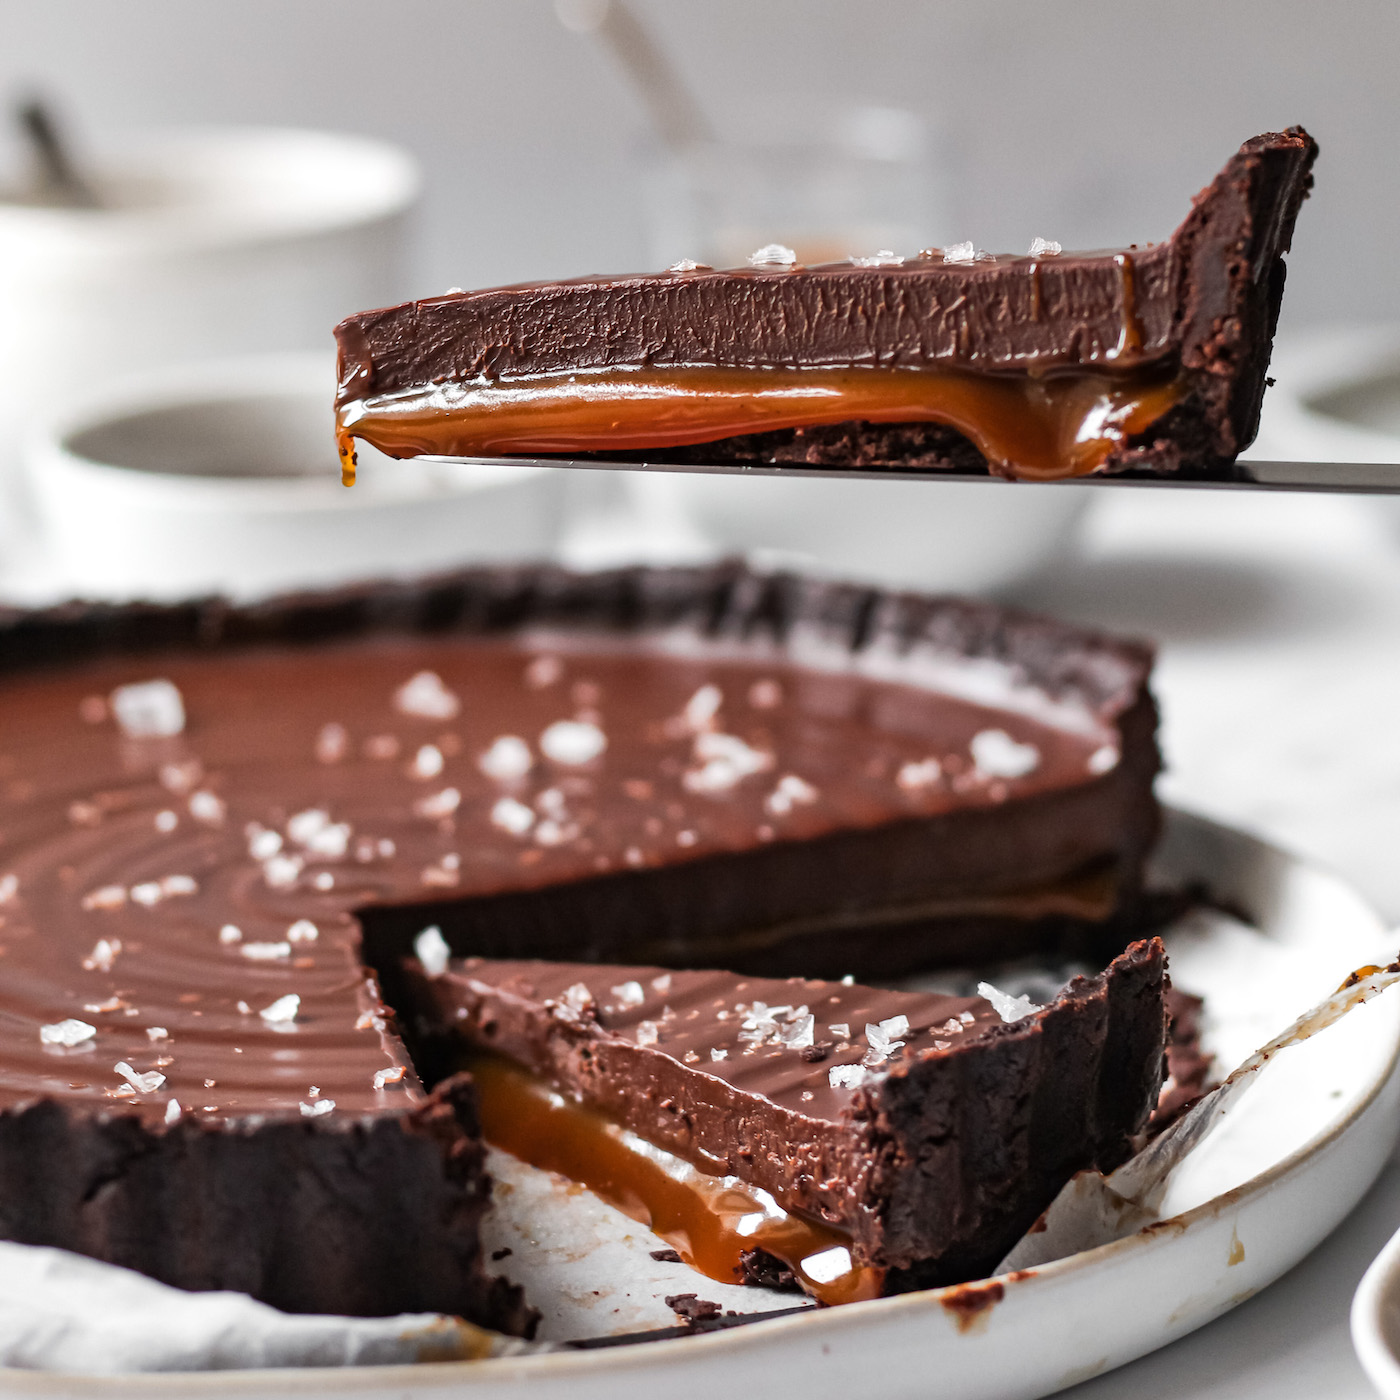
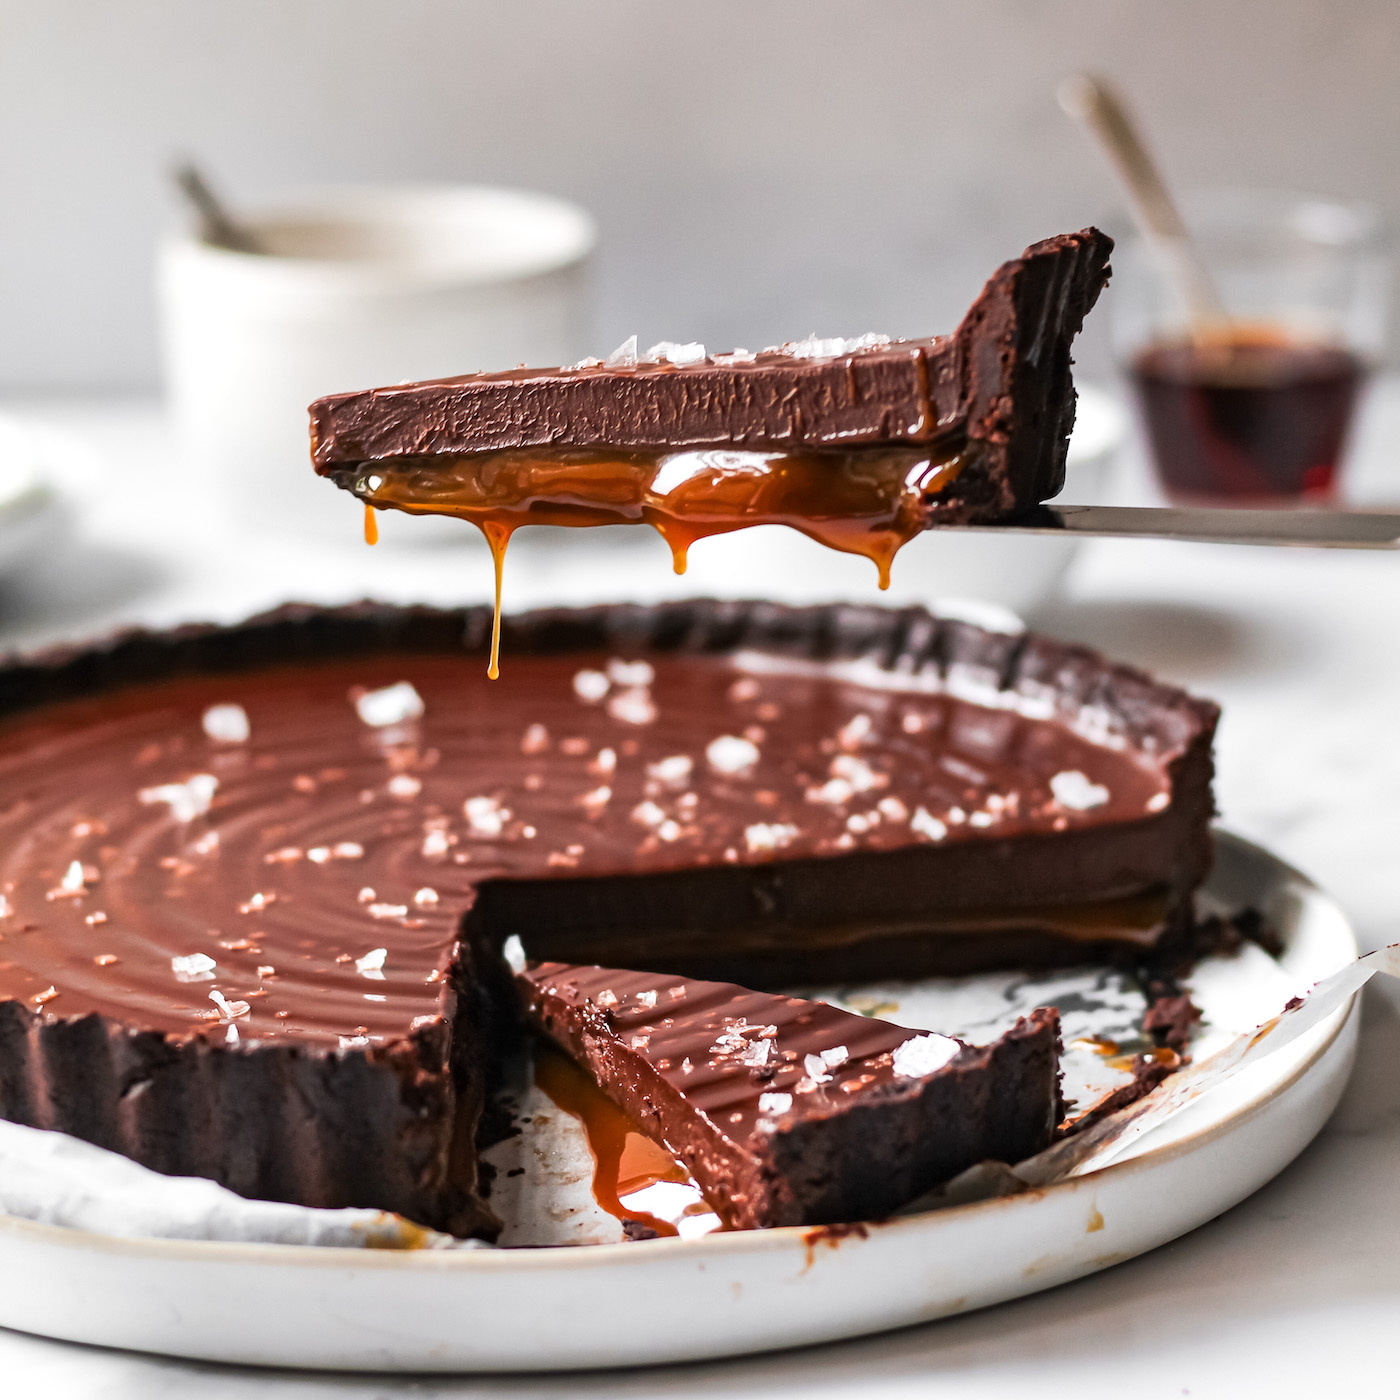
Hi baking friends! This is the recipe for my decadent, oozy, vegan salted caramel chocolate tart recipe! (That’s a lot of adjectives…)
Feel free to skip to the recipe if you’re excited to try this delicious treat but if you’re a novice baker I would thoroughly recommend giving these notes a quick skim just because caramel and pastry can be tricky baking skills.
I spent a while online looking for caramel inspiration and I found such a large variety in the recipes. Many plant-based dessert makers opt for “healthy” ingredients such as dates and maple syrup which can work well however I’m going to stick to the traditional methods. Caramel can be difficult to work with but it has such an excellent pay-off when you nail it! Traditional methods require candy/sugar thermometers but to make this recipe more accessible to my viewers I’ve built a recipe that does not require one!
Baking Guidance:
Throughout my blog I use the term “vegan butter” which might throw some people off as in most places/languages, butter includes dairy. In my recipes, I almost always use a vegan “butter” called ‘Vegan Baking Block’ by Naturli (I am based in the UK). It has no palm oil, it claims to be organic and it has the perfect % of fat (75%). If you don’t have access to Naturli then I would really recommend finding a vegan butter/margarine that has close to 75% fat.
If you’re using a can of coconut cream for this recipe (instead of cartons of pure coconut cream) make sure to chill the can the night before. This allows the solids and liquids to separate so you can scoop out just the cream for the recipe!
I use a 25cm/10-inch flan case for this recipe which is probably the biggest you want this dessert. If you have a smaller flan/pie dish then just use the same measurements and make a few extra mini version (in ramekins or smaller flan cases) as it’s not worth the risk of trying to scale everything down 20% and making a mistake!
Chocolate Crust:
The crust recipe here is a vegan equivalent of a pâté sucrée. My recipe is heavy on the cocoa as I wanted the crust to have some bitterness to balance with the sweetness of the caramel and ganache filling. I have a tutorial for making a pastry in my pecan pie recipe that you can check out here! When you bake the pastry, make sure the parchment is pushed into all the edges and weighed down with ceramic beans or what ever you have available!
If you’re not fussed about traditional pastry methods, you could also make a no-bake crust using oreos + vegan butter!
Vegan Salted Caramel:
Working with caramel is tricky. Timing is super important and there’s only a few visual cues you can use to get things right. I’m using a dry caramel method in this recipe. This means we melt the sugar directly without adding any liquid. The benefits to this method are simplicity and control; the cons are that it can burn and crystalise easily so keep your eye on it constantly.
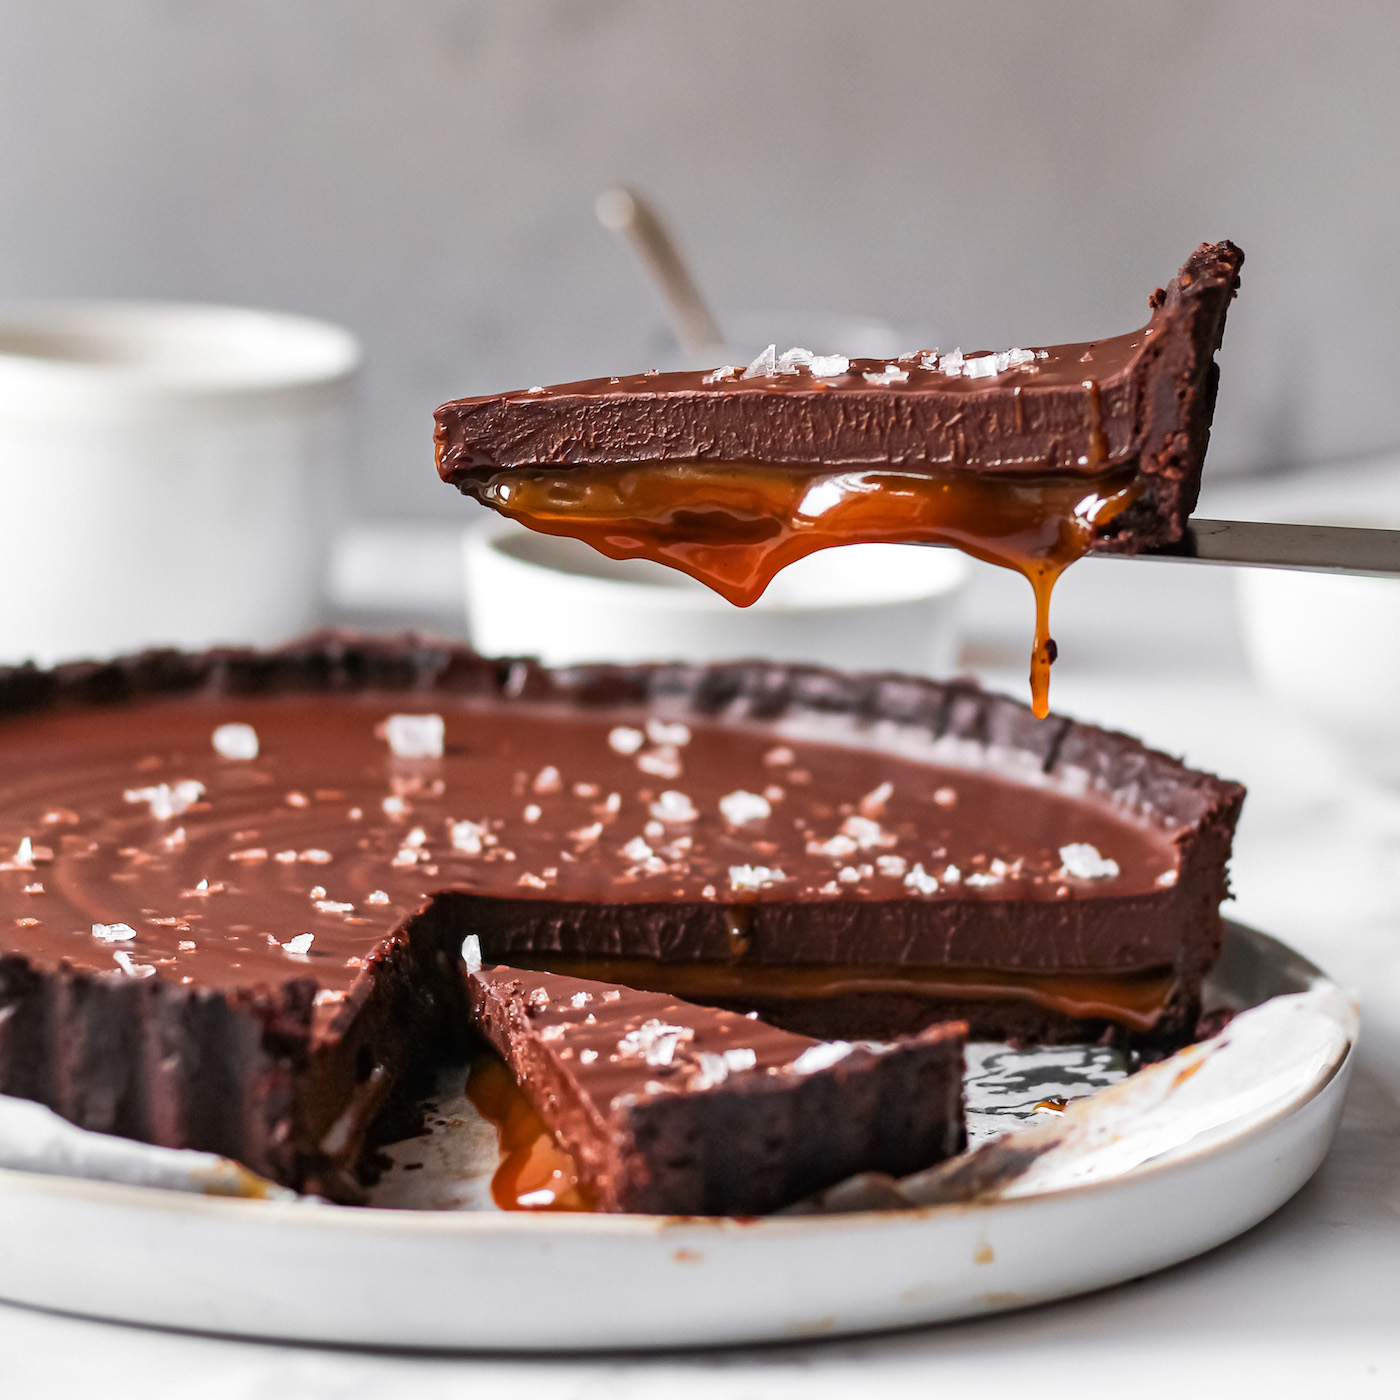
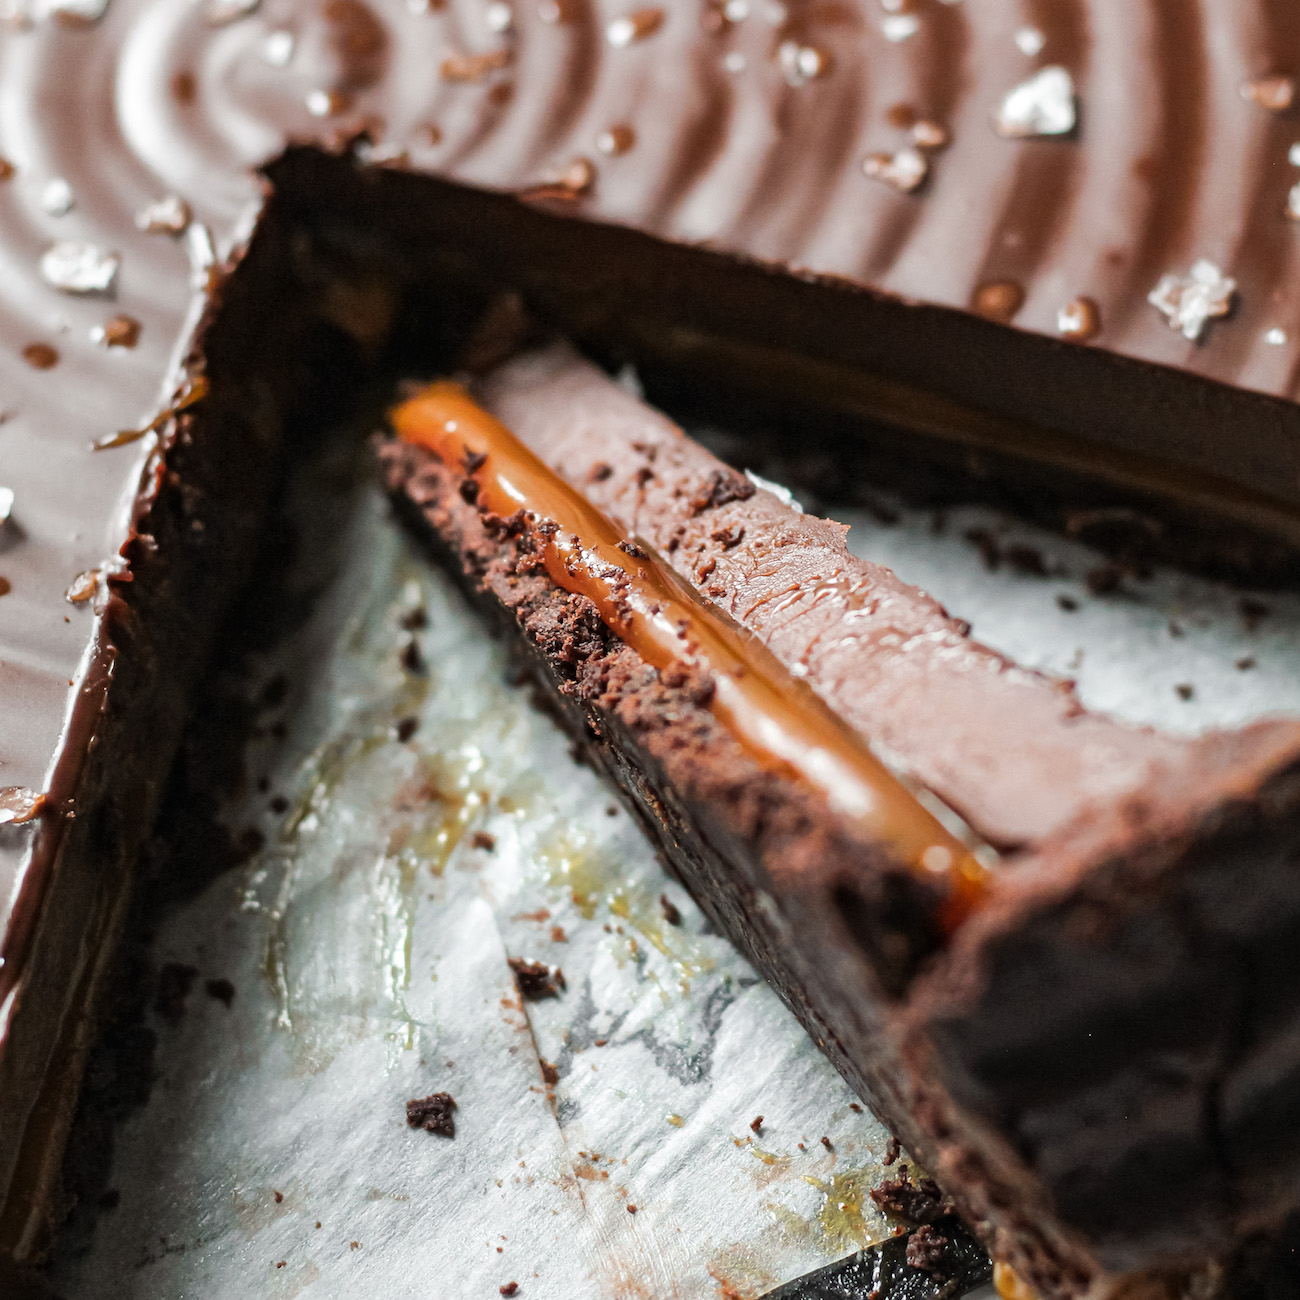
The salted caramel must be solid at room temperature or else it will just pour out of the tart when you cut it. When you first add the granulated sugar to the pan, try to avoid agitating it until it starts to caramelise. Nothing will appear to happen for a while but eventually the sugar will start to melt into chunks. To prevent burning, gently move around the sugar with a spatula until these chunks eventually form a thick amber liquid.
Leave a 30 second gap between each time you add butter/coconut cream – the sugar needs time to heat back up after you’ve added a cooler element. If you rush this part, the sugar will harden and it will take a while to melt back down (and you risk burning the whole thing). Do keep stirring the caramel on a low heat for 5 minutes afterwards.
A good way to check if it’s ready is to spoon a small amount from the pan onto a cold plate or ice cube and wait 1-2 minutes to see if it “sets” or if it is still super liquidy. It’s better to have this filling on the firmer side than too liquid. Add the salt and the vanilla last when the caramel is off the heat. Vanilla extract is alcohol-based so if you add it while the caramel is on the heat, all the alcohol will cook off and most of the flavour will be lost.
Vegan Chocolate Ganache:
This is a relatively simple ganache so it shouldn’t be hard to follow! A couple tips:
- don’t burn the chocolate in the microwave (always <30 seconds in the microwave at a time!)
- try not to mix elements with contrasting temperatures (i.e. don’t add a super hot cream to a chilled chocolate).
- “coconut cream” in this recipe refers to the cream that collects in a can of chilled coconut milk
- I use a chocolate with ~55% solids. This melts well and isn’t too bitter.
Onto the recipe:
Vegan Salted Caramel Chocolate Tart
Irresistibly decadent vegan salted caramel chocolate tart. Perfect for chocolate and caramel lovers alike! No challenging ingredients or special tools needed!
Ingredients
- Chocolate Crust
- 180g all-purpose flour
- 2 tbsp sugar
- 50g cocoa powder
- 140g vegan block butter, chilled
- ½ tsp sea salt
- 1-2 tbsp chilled plant milk (if necessary)
- Salted Caramel Layer (dry caramel method)
- 200g caster sugar
- 120g coconut cream (from a chilled can of coconut milk) or vegan “double” cream
- 80g vegan block butter
- 3/4 tsp of salt
- 1 tsp vanilla extract
- Dark Chocolate Ganache Filling:
- 350g finely chopped dark chocolate
- 250g coconut cream (or vegan cream)
- pinch of salt
Directions
- Step 1 Crust: Sieve together the flour, icing sugar, cocoa powder and salt in a large mixing bowl.
- Step 2 Cut up the vegan butter into small cubes and add it to the dry ingredients. Use a pastry blender (or a whisk/fork) to cut up the butter until there are no large pieces of butter left. Add 1 tbsp of cold plant milk if the dough is still a bit too dry and then pack the dough into a tight disc.
- Step 3 Wrap up the dough and leave it in the freezer to rest for 30 minutes.
- Step 4 Brush some butter on the flan tin base and then add in a circle of parchment.
- Step 5 Take the dough out of the fridge and set aside for a few minutes to warm up so we can roll it out. Roll out the dough until it is 3mm thick and then drape over the flan tin. Push the dough into the corners and gently press the dough against the sides.
- Step 6 Trim off any excess, cover with parchment and put in the freezer to chill for 15 minutes.
- Step 7 Pre-heat the oven to 180C (355F).
- Step 8 Take the crust out of the freezer, line it with parchment and fill with ceramic beads. Make sure they are pushed into every corner so that the whole thing is weighed down. Bake for 25 minutes.
- Step 9 Take the crust out of the oven, remove the beads and parchment then bake for another 10-15 minutes.
- Step 10 Take out of the oven and leave to chill. Once the pie crust is cool, work on the salted caramel filling.
- Step 11 Salted Caramel: Put the sugar in a pan on low-medium heat. Avoid touching the sugar as much as possible. Once the sugar starts to caramelise and turn a light amber, use a silicone spatula to slowly move the sugar around to make sure it has fully melted. Do not leave the sugar unattended as it can burn within a matter of seconds.
- Step 12 Once all the sugar has dissolved, slowly add chunks of vegan butter to the liquid sugar. The mixture will bubble but keep stirring.
- Step 13 Once all the sugar has dissolved, warm up the coconut cream in the microwave.
- Step 14 Turn the heat off and carefully add in a small amount of the warm coconut cream at a time. The mixture will bubble and splash so be careful.
- Step 15 If the caramel separates, turn the heat back on and keep stirring until it all recombines before adding more coconut cream.
- Step 16 Use the ice water test to see if the caramel is at the consistency you’re looking for. This will vary depending on the butter and coconut cream you’ve used and how long it took you to get to this stage. If it’s not thick enough, turn the heat back on and stir very carefully, cooking down the caramel for a further 2-3 minutes.
- Step 17 Take off the heat and add the salt and vanilla.
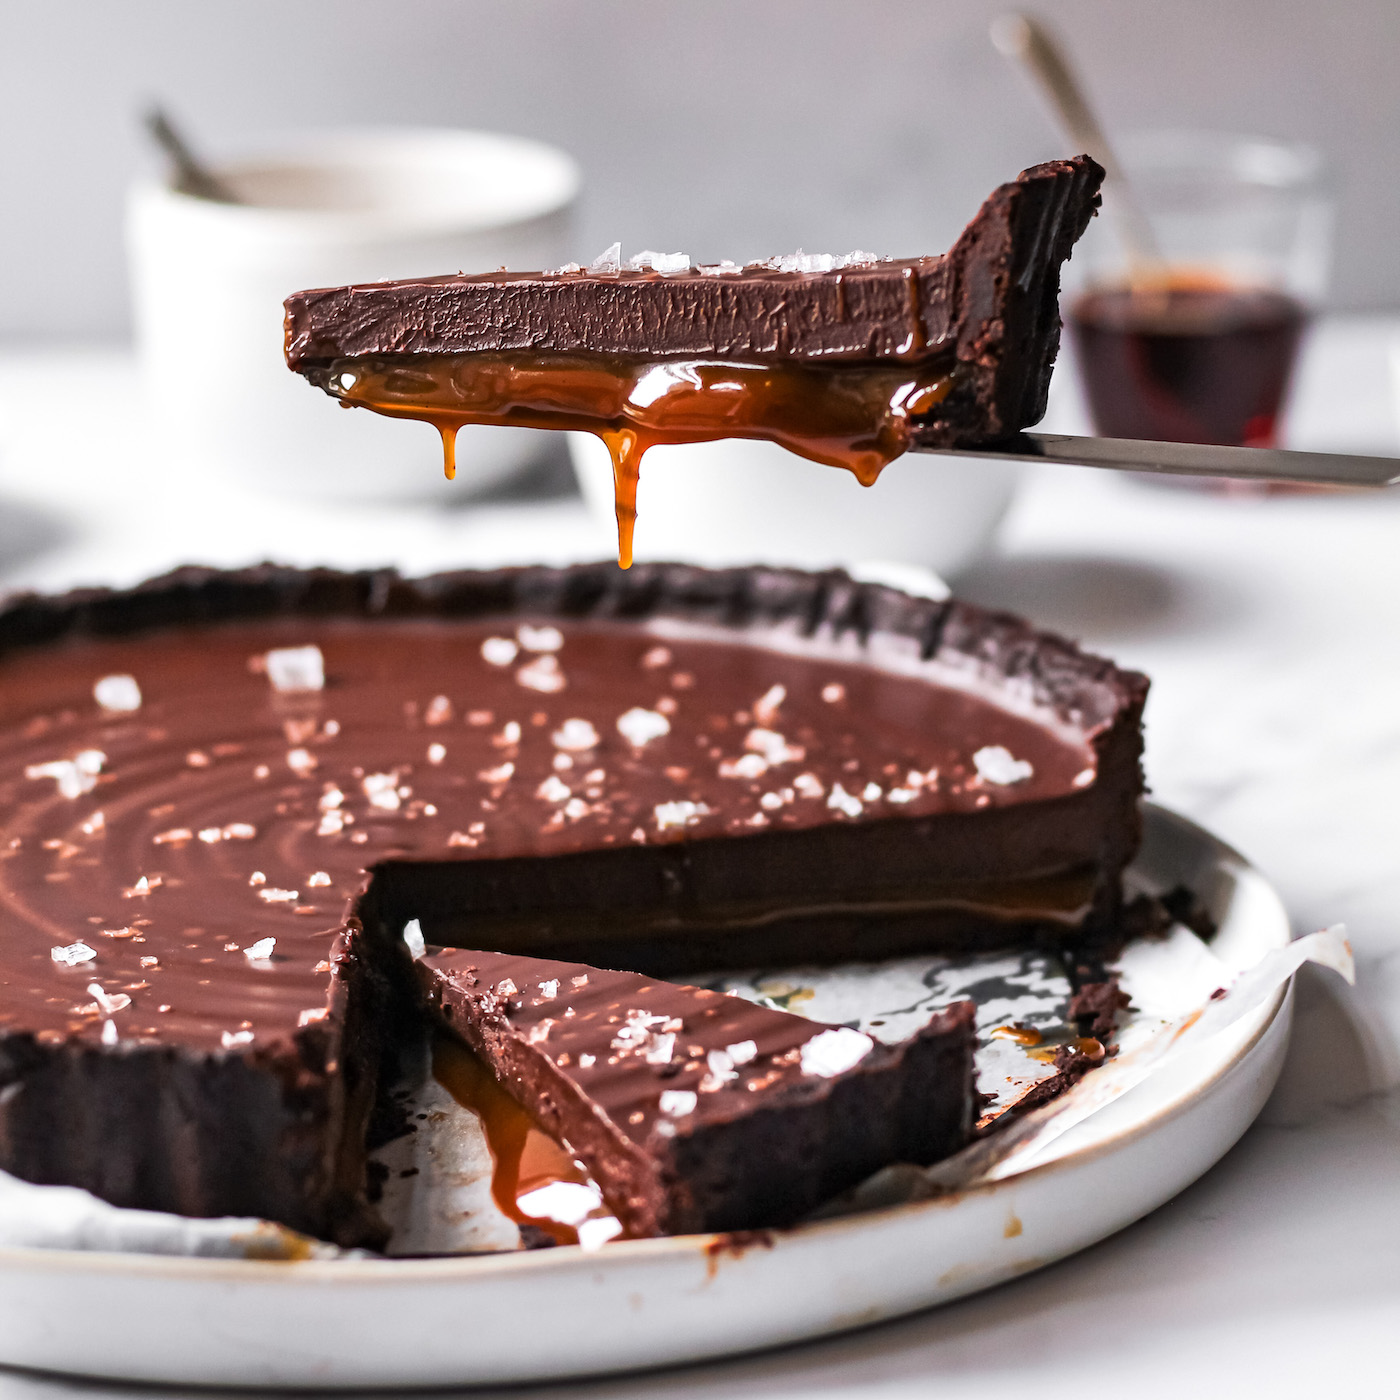
- Step 18 Pour the caramel into the cooled crust.
- Step 19 Chocolate Ganache: Melt the chocolate in a bowl in the microwave using 20-30 second bursts.
- Step 20 Heat the coconut cream on the hob. Once it is hot, pour the hot cream over the warm, melted chocolate. Leave for 1 minute and then mix together until homogenous.
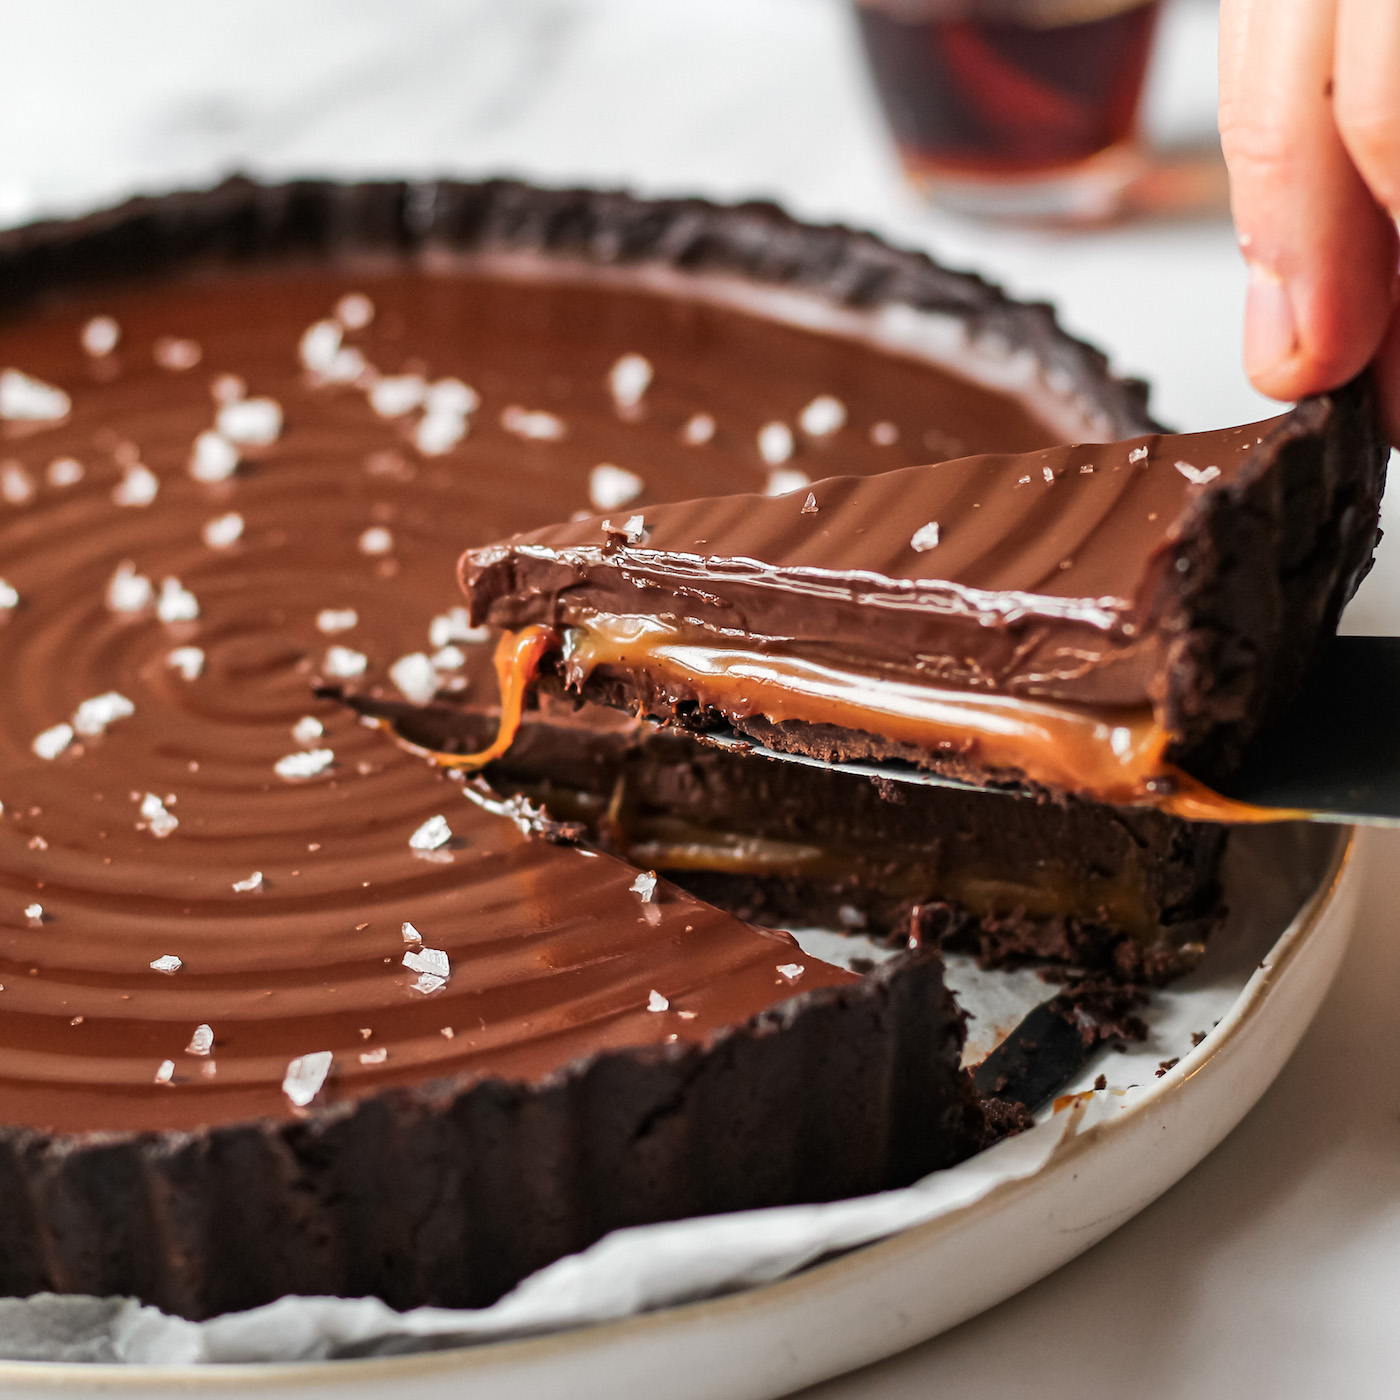
- Step 21 Pour the ganache over the cooled crust + caramel.
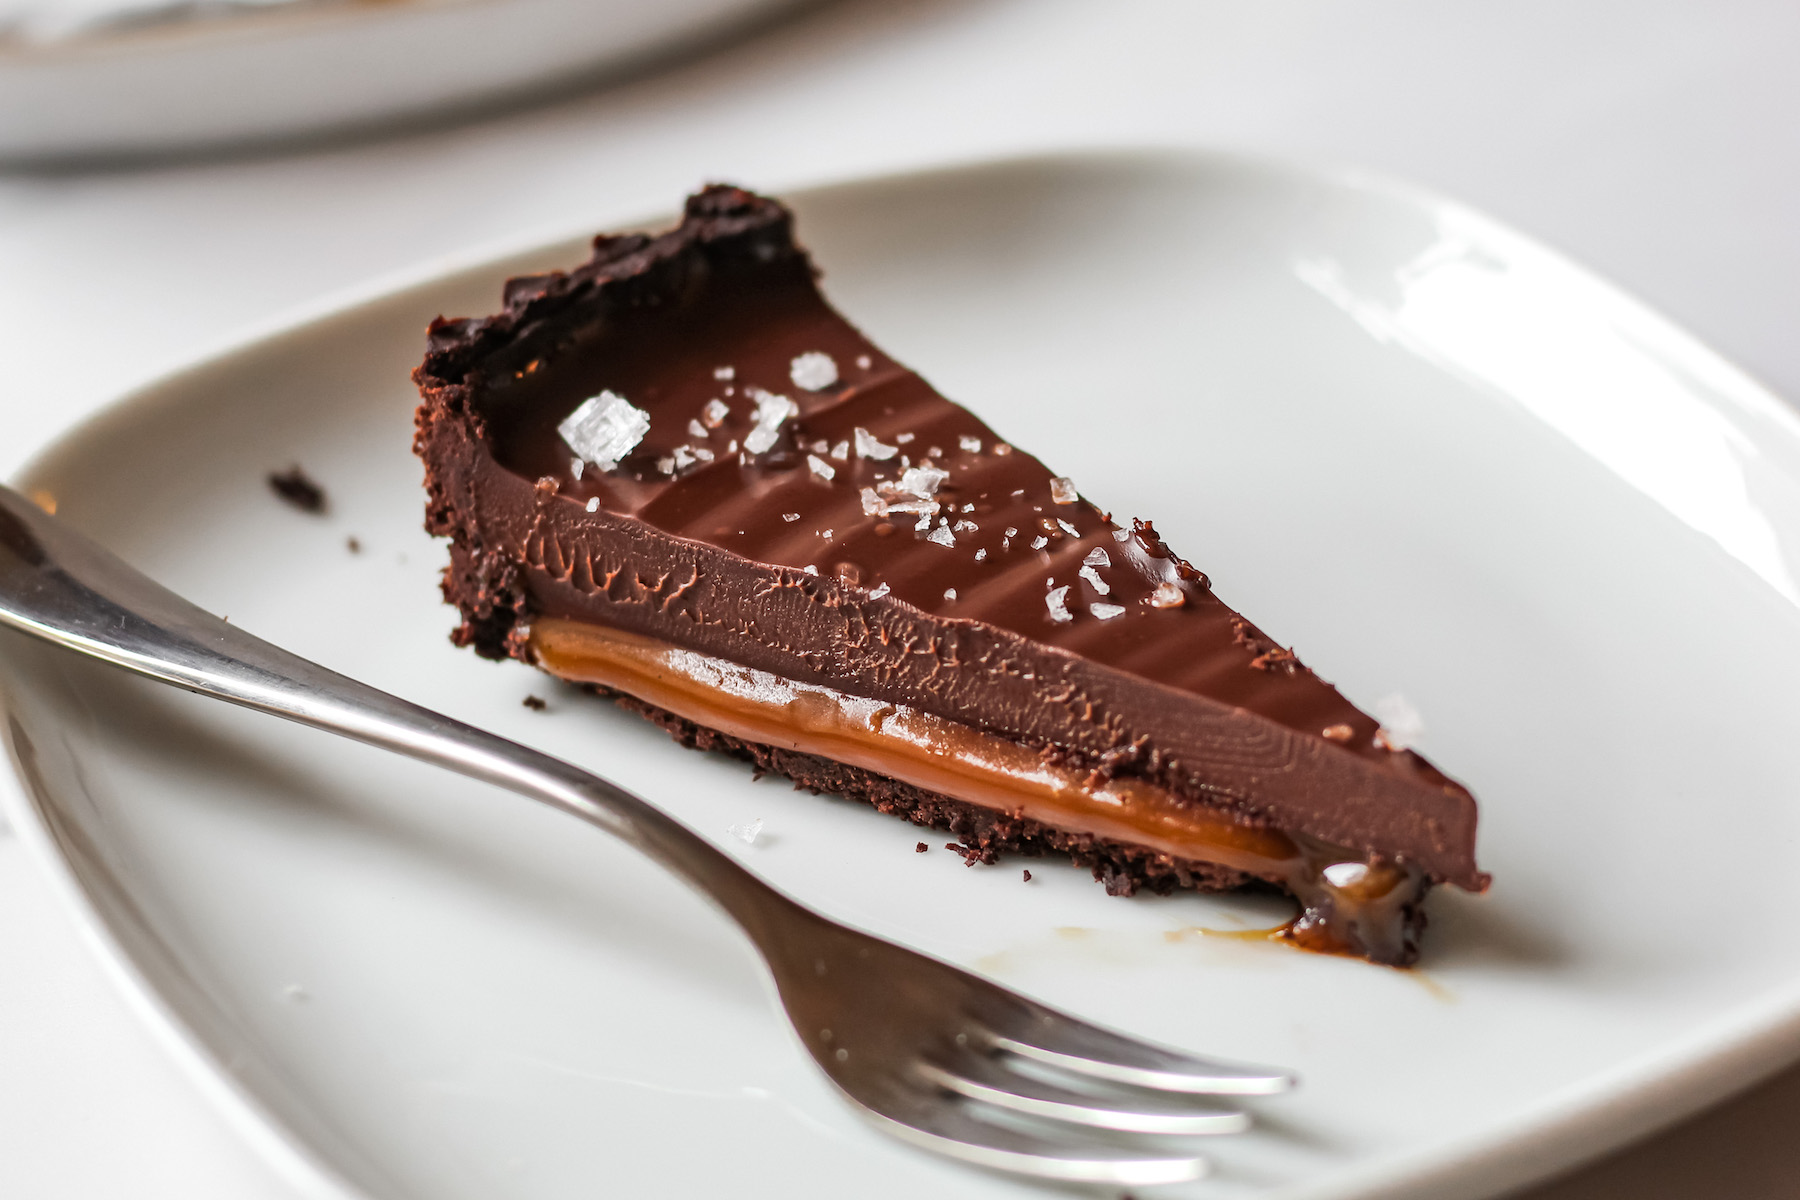
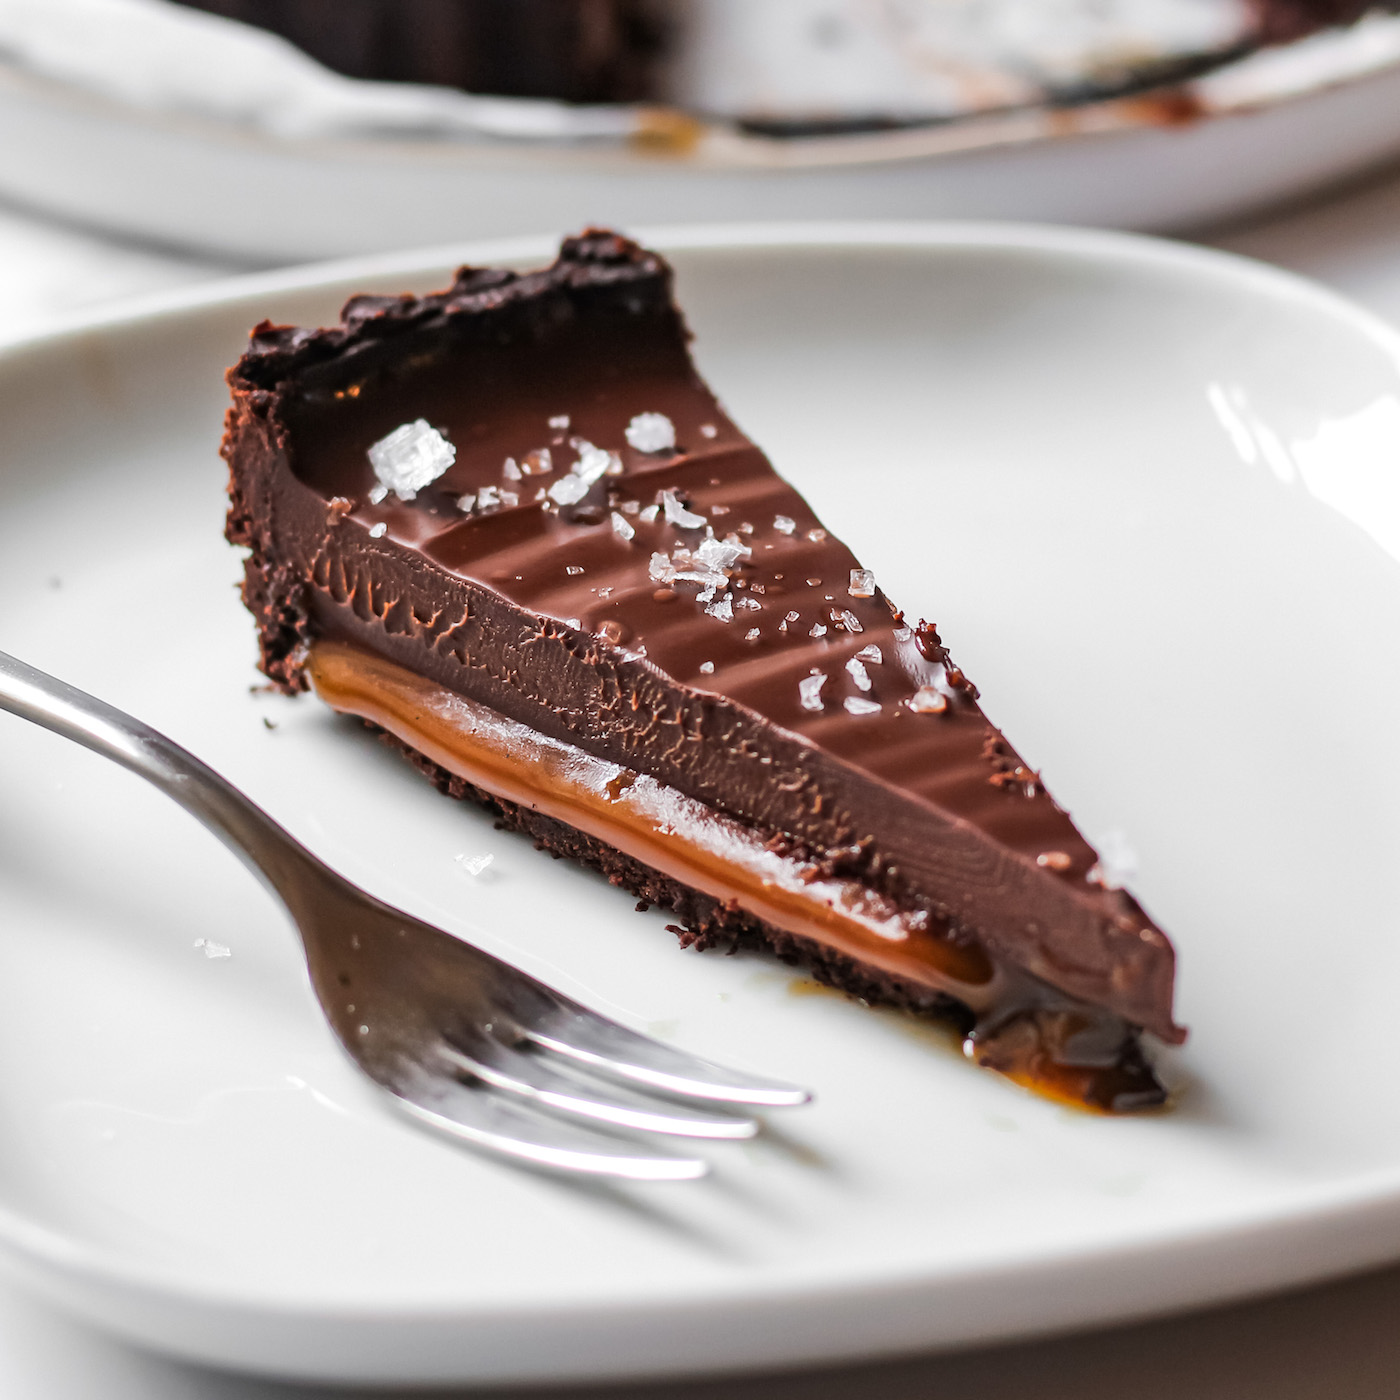
- Step 22 Garnish with whatever you like!
I made this for Christmas, and it’s probably the most difficult recipe I’ve attempted so far. To my great surprise, it turned out perfectly! I was particularly nervous about the caramel, and even though the method described above worked very well I will get a candy thermometer for the next time. I really appreciated the very detailed description of the whole process.
Hi! How far in advance can I make this? Would making it the day before and keeping it in the fridge work?
Such a luxurious recipe! Definitely a showstopper! Thank you! I made it this year again for Christmas!
Thanks For Sharing this amazing recipe. My family loved it. I will be sharing this recipe with my friends. Hope the will like it.
This tastes so good! I just want to keep eating it. Ended up making less of the ganache (2/3rd) because I ran out of coconut cream after burning the first batch of caramel, but I think the layer was still thick enough. There is one problem though: some of the coconut milk seemed to separate of the ganache a few hours into the process of cooling down. Do you have any idea what may have caused this? Thanks for the amazing recipe.
Hi! So glad you enjoyed it. Not sure about the coconut milk separation but I have 3 ideas. Did you use a chocolate with more than 70% cocoa solids? I’d definitely recommend using between 50-70% to be safe! If you microwaved the coconut cream to warm it up, sometimes a very thin “skin” will form on top of the liquid which is caused by some of the stabilisers breaking down and separating from the cream. You can remove this by pinching it off after microwaving. Another possible reason is that your coconut cream had a bit too much coconut water/milk in it- you can avoid this by just using the solid part in can of coconut milk. Hope that helps!!
Thanks for the reply! The high water content of my coconut cream might have indeed been the problem. The cream hadn’t really hardened out properly when I wanted to use it so there was still some water in it. I’ll try the recipe again this week and I’ll let you know how it turned out! 🙂
No problem at all! Good luck for attempt 2! 🙂
Can’t wait to try this!!!!!!